Routing
Routing
The routing view is organized as a list-based connection system. Sources are shown on the left, destinations are shown on the right, and the connections between them are created as rows in the center.
Select any source on the left-hand side and a free destination on the right-hand side.
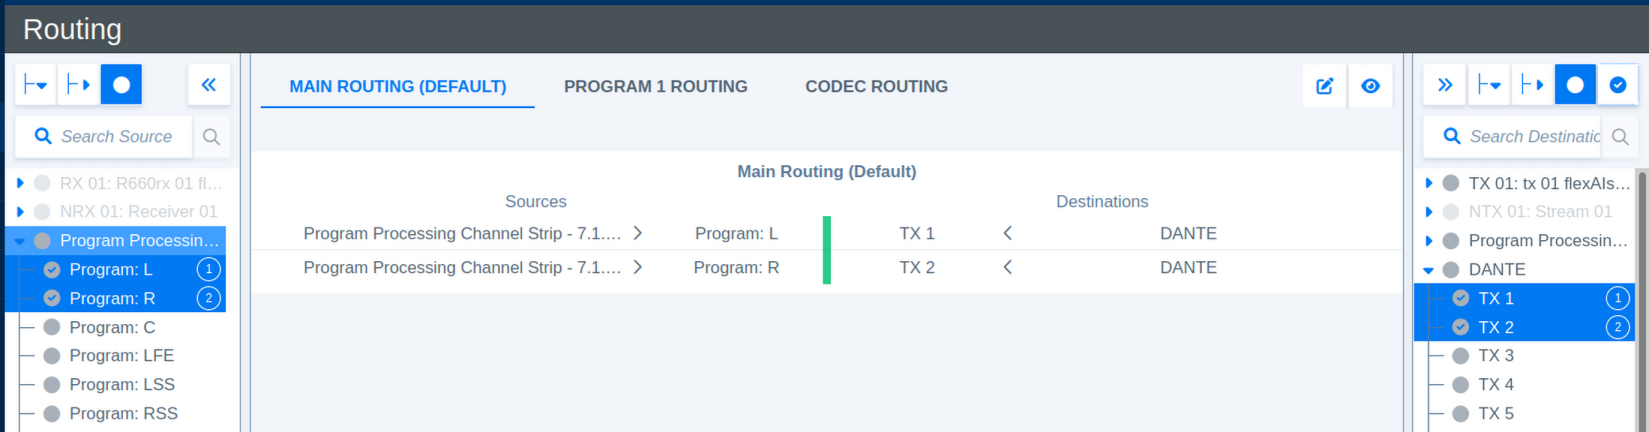
To connect the selected routing click on Link (New) at the bottom of the center section.

Any source can be used for routing with no limitations, destinations can only be used once. Connections will be established in the order of the ascending selection. This order is marked with ascending numbers on each selected source and destination.
Several shortcuts are available for managing routings:
- Holding CTRL while selecting sources or destinations will add them to the selection.
- Holding SHIFT enables selecting multiple adjacent sources or destination in a selection.
- Keep the mouse cursor steady over one of the icons to see a short description of its function.
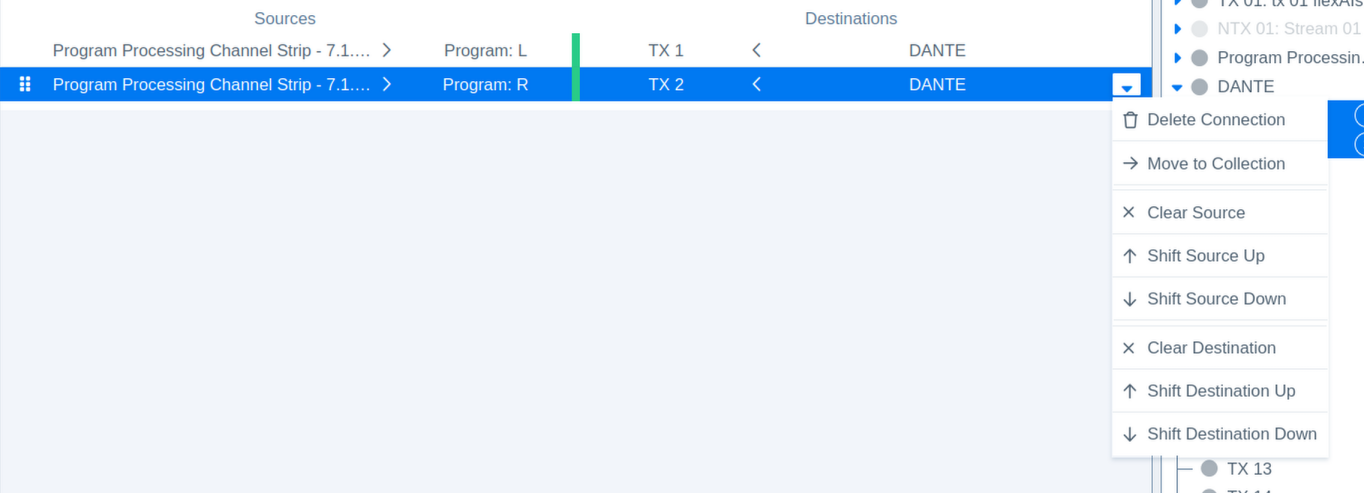
After selecting a connection multiple tools are available for modifying sources, destinations and other fuctionality.
Routings can be managed in separate Routing Collections.
Each Routing Collection can hold its own Presets.
Routing Collections
Routing Collections allow you to organize routing connections into separate groups. Each collection can have its own presets, making it easier to manage different sets of connections for different workflows, signal groups, or operating scenarios.
The available collections are shown at the top of the routing view. Select a collection name to display and manage the connections assigned to that collection.
Use the icons in the upper-right corner of the routing view to manage collections and change the displayed connection view.
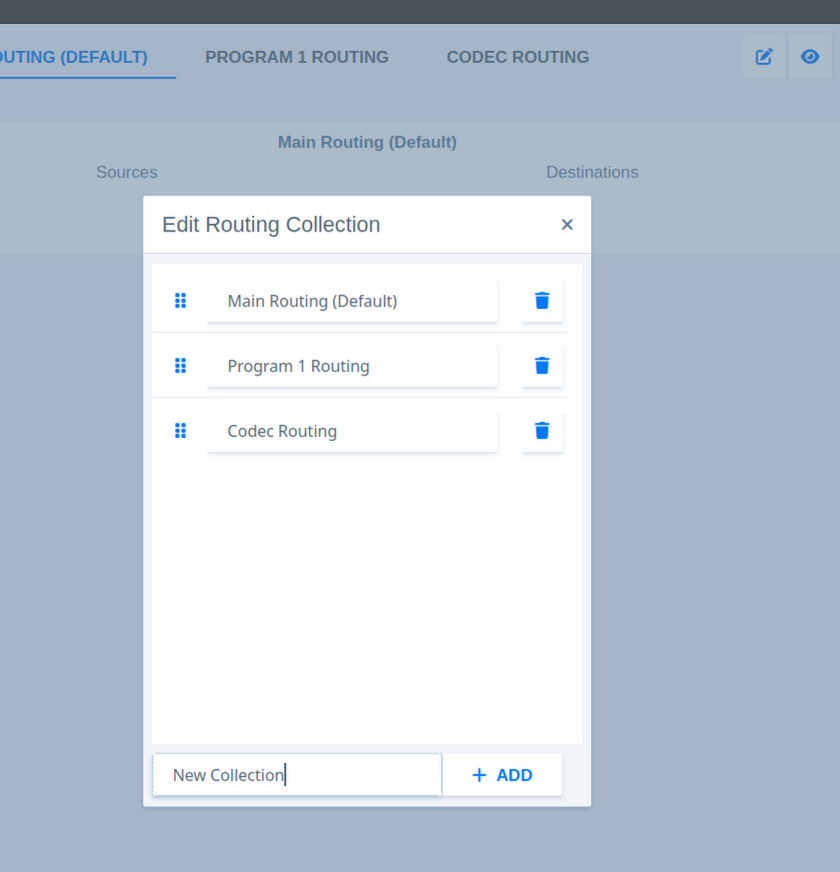
The Edit icon opens the collection menu. From this menu, you can add a new collection, rename an existing collection, or delete a collection.
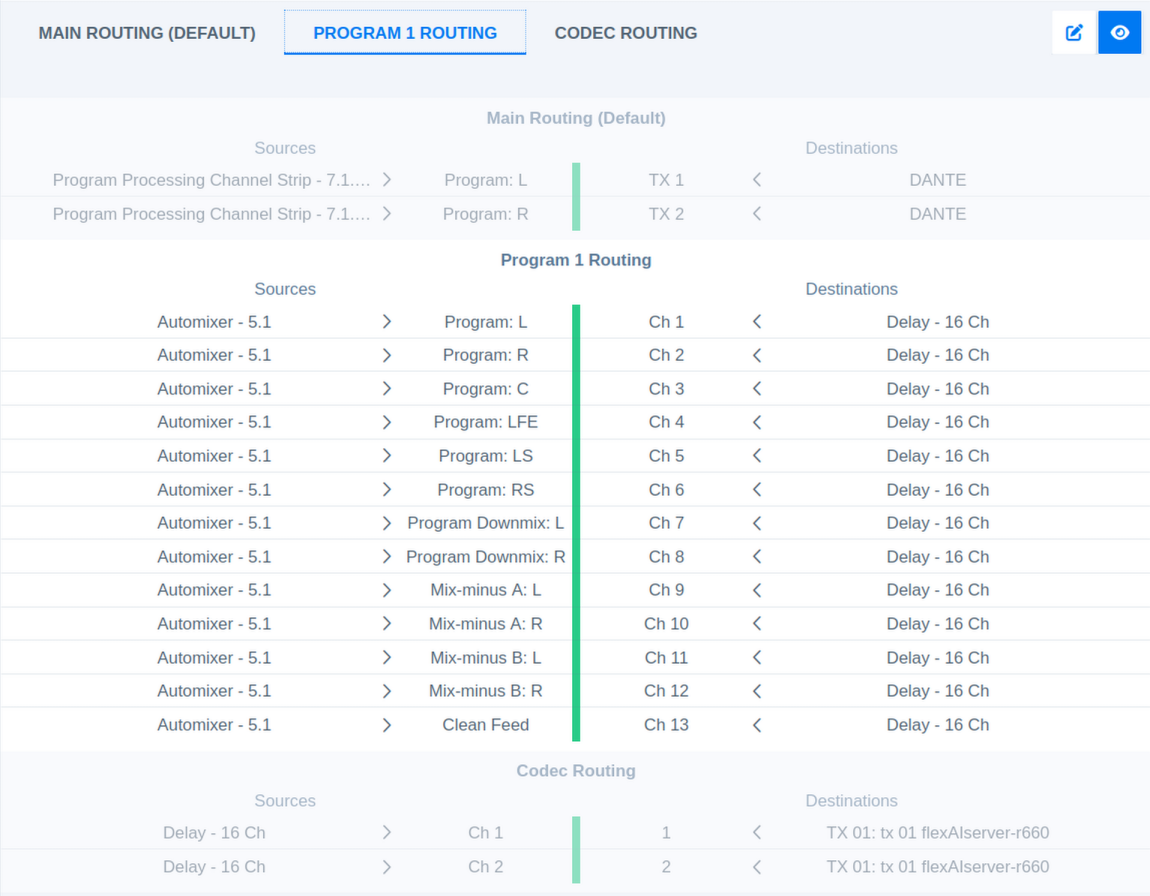
The Eye icon switches the view between the selected collection and all available connections. The currently selected collection is highlighted and underlined in the collection bar.
Each Routing Collection has its individual set of presets.
Routing Presets
Presets can be managed by clicking on the Preset icons:
| Parameter | Function |
| File Icon | Open the Load Preset dialog |
| Floppy Disc Icon | Open the Save Preset dialog |
| Three Dots Icon | Open more dialogs (Preset Operations), mainly used to open the Delete Preset dialog |
Save Presets
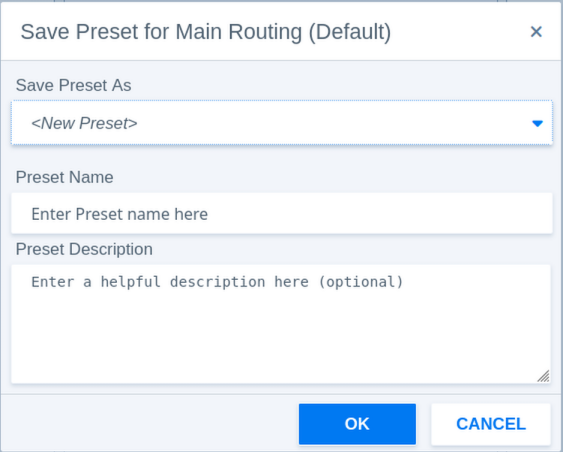
| Parameter - Save Preset | Function |
| Save Preset As | Select to create a new preset or overwrite an existing preset. |
| Preset Name | Enter a preset name here. |
| Preset Description | Optionally a description can be added to help identifying presets. |
Load Presets
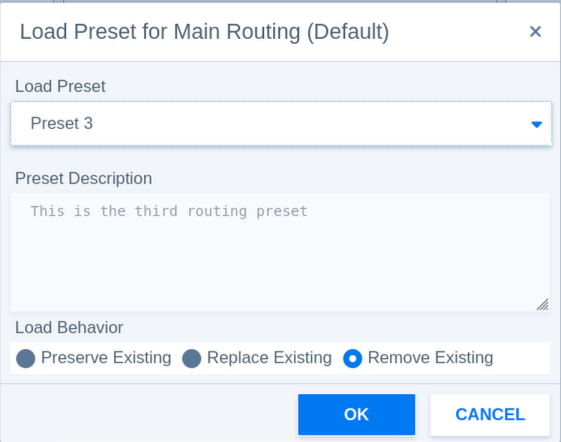
| Parameter - Load Preset | Function |
| Load Preset | Select the preset to load. |
| Preset Description | The description helps identifying presets. |
| Load Behaviour | Decides what happens to existing routings. |
| Preserve Existing | Routings in the preset will be added to the existing routings. This might cause conflicts when destinations are used in multiple connections. |
| Replace Existing | Replaces routings with the same destinations only. |
| Remove Existing | Removes all existing routings and creates new routing connections from the preset values. |
Preset Operations (Delete Presets)
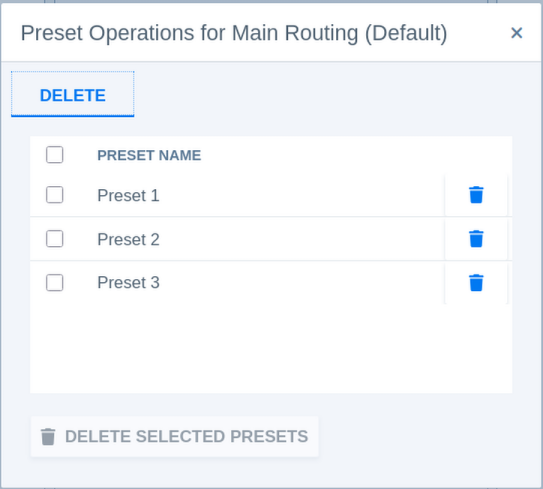
| Parameter - Delete Preset | Function |
| Select Preset | Select the preset(s) to delete. |
| Bin Icon | Delete individual presets. |
| Delete Selected Presets | Delete all selected presets. |