System
- Setup
- Network
- Certificates
- Update
- Logging
- Licensing
- Info
- Users
- Storage
- Terminal
- Backup / Restore
- Power
Setup
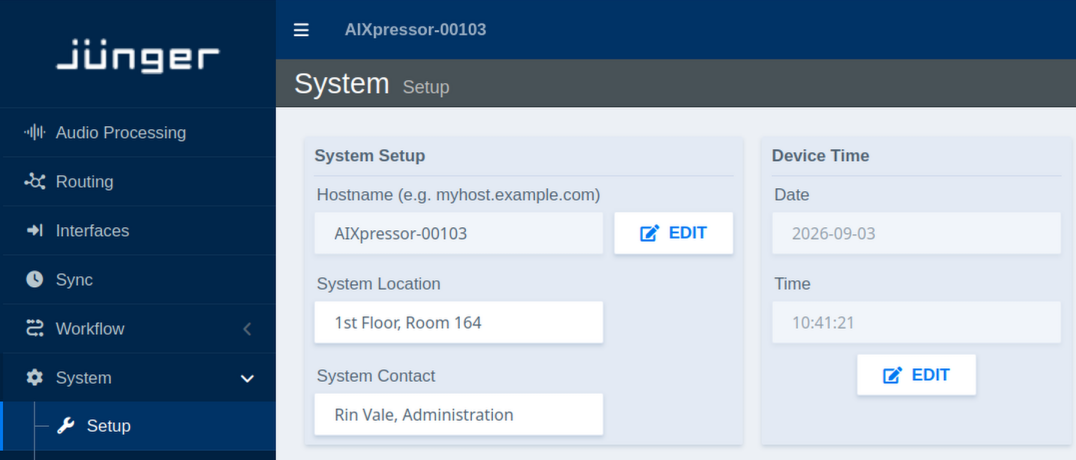
System Setup:
| Parameter | Values | Default | Description |
|---|---|---|---|
| Hostname | Text | Device name | Sets the network hostname for device identification (click Edit) |
| System Location | Text | - | Defines the physical location of the device for administrative purposes |
| System Contact | Text | - | Specifies contact person or department responsible for the device |
Device Time:
| Parameter | Values | Default | Description |
|---|---|---|---|
| Current Date | Status | - | Displays the current device date |
| Current Time | Status | - | Displays the current device time |
| Edit | Button | - | Opens time configuration dialog. |
Note: Manually set values may be overridden by NTP synchronization (see System → Network → NTP)
Network
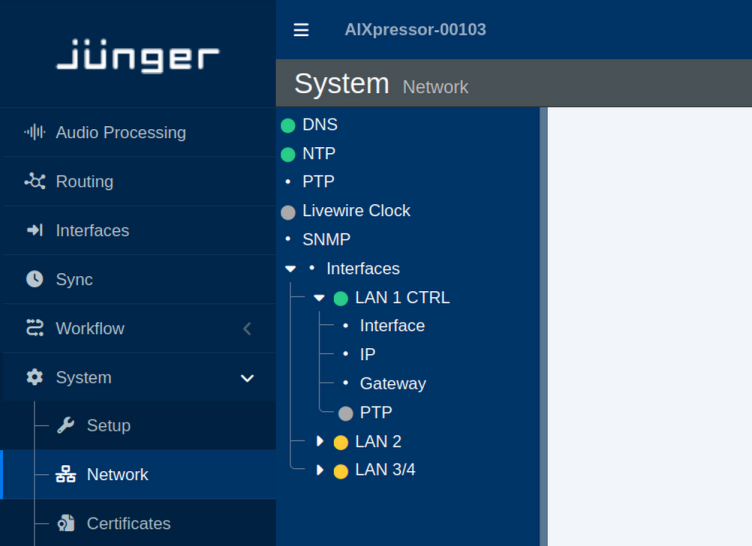
This section describes the network-related settings available in the flexAI web interface.
The examples in this section use **LAN 1 CTRL**, as labeled on the AIXpressor. The same configuration options are available for the other network interfaces, depending on the physical configuration of the flexAI system.
Overview
DNS
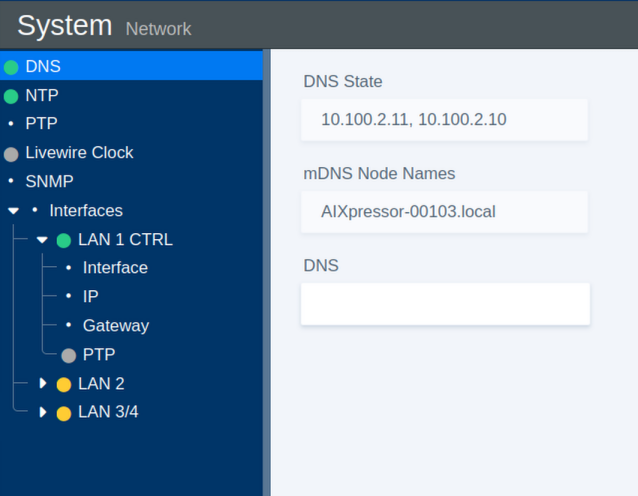
The DNS section provides the name resolution and local network discovery settings.
| Parameter | Values | Default | Description |
|---|---|---|---|
| DNS State | Status | - | Shows the current DNS state. |
| mDNS Node Name | Status | - | Shows the multicast DNS (mDNS) name used for local network discovery. |
| DNS | On / Off | - | Enables or disables standard DNS resolution for domain name lookups. |
NTP
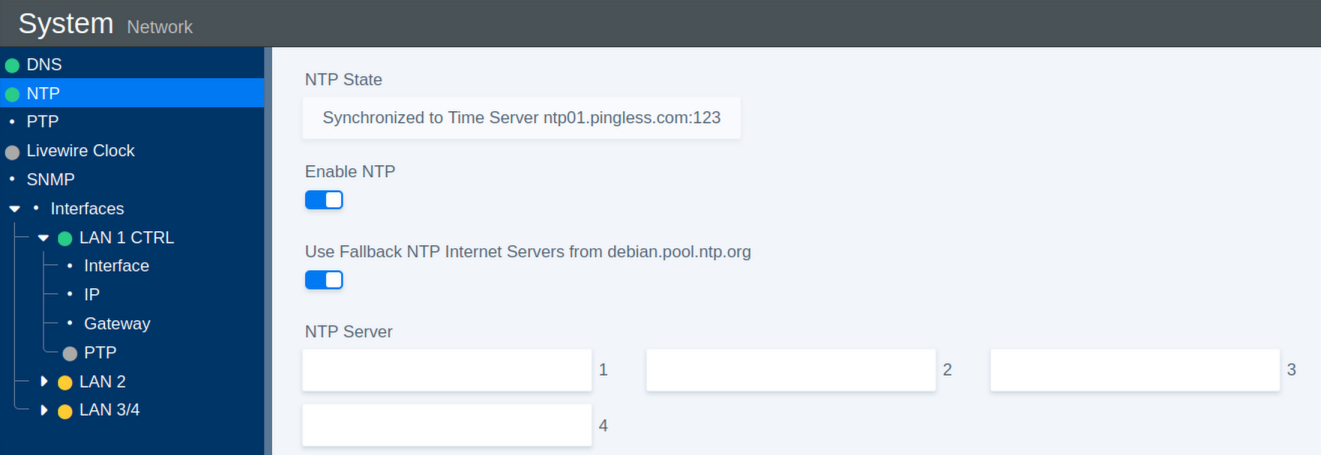
The NTP section configures Network Time Protocol synchronization for the system clock.
| Parameter | Values | Default | Description |
|---|---|---|---|
| NTP State | Status | - | Shows the NTP server to which the system is currently synchronized. |
| Enable NTP | On / Off | On | Enables or disables NTP time synchronization. |
| Use Fallback | On / Off | On | Enables fallback to public Debian NTP servers if none of the configured servers are available. |
| NTP Server 1 | URL | - | Defines the primary NTP server. |
| NTP Server 2 | URL | - | Defines the secondary NTP server. |
| NTP Server 3 | URL | - | Defines the tertiary NTP server. |
| NTP Server 4 | URL | - | Defines the fourth NTP server. |
Livewire Clock
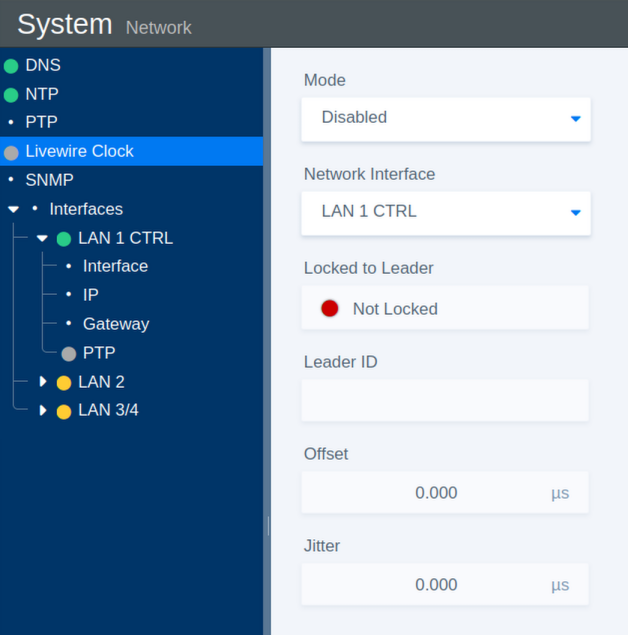
The Livewire Clock section provides synchronization settings and status information for Livewire clocking.
| Parameter | Values | Default | Description |
|---|---|---|---|
| Mode | On / Off | On | Enables or disables Livewire clock synchronization. |
| Network Interface | Select | - | Selects the network interface used for Livewire clock communication. |
| Locked to Leader | Status | - | Indicates whether the system is synchronized to the current Leader Clock. |
| Leader ID | Status | - | Shows the identifier of the current Leader Clock. |
| Offset | Status | - | Shows the time offset between the system and the Leader Clock. |
| Jitter | Status | - | Shows the measured timing jitter. |
SNMP
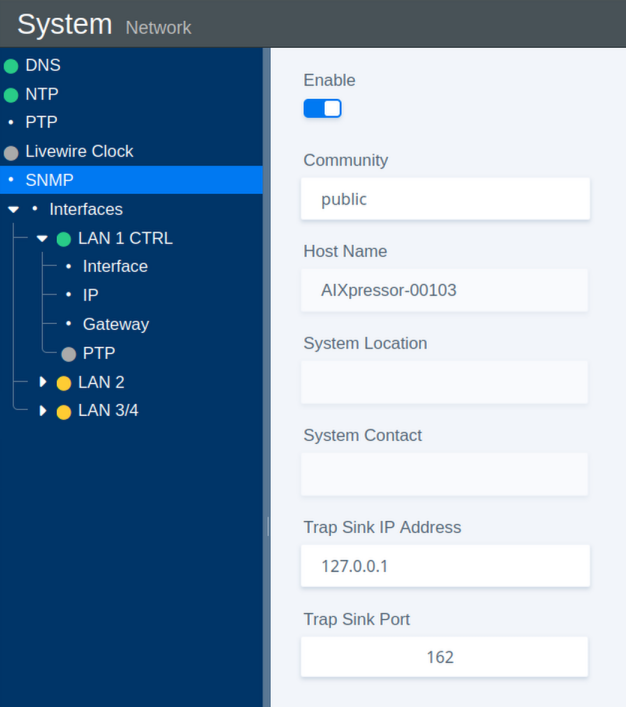
The SNMP section configures Simple Network Management Protocol monitoring.
| Parameter | Values | Default | Description |
|---|---|---|---|
| Enable | On / Off | On | Enables or disables the SNMP agent. |
| Community | Name | public | Defines the community string used for SNMP access. |
| Host Name | Status | - | Shows the system host name. |
| System Location | Status | - | Shows the configured physical location of the system. |
| System Contact | Status | - | Shows the configured contact information for the system. |
| Trap Sink IP Address | IP Address | - | Defines the destination IP address for SNMP trap messages. |
| Trap Sink Port | Port Number | 162 | Defines the destination port for SNMP trap messages. |
Interfaces: IP Address
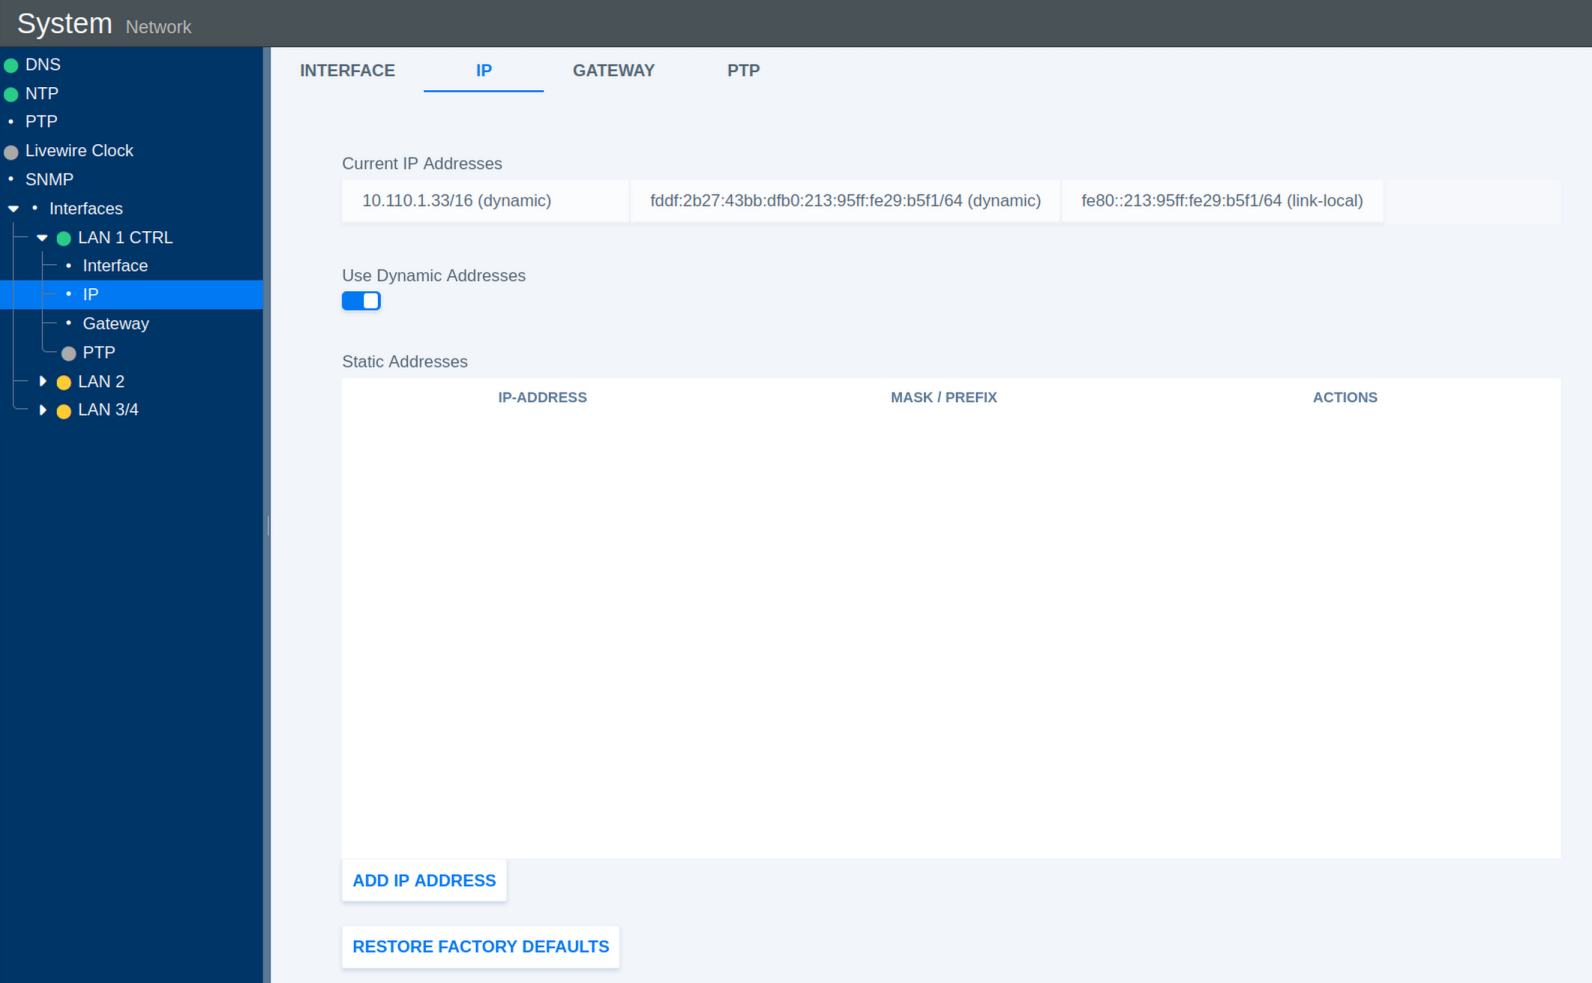
This section configures the IP addresses assigned to the selected network interface.
| Parameter | Values | Default | Description |
|---|---|---|---|
| Current IP Addresses | Status | - | Shows all IP addresses currently assigned to the interface. |
| Use Dynamic Addresses | On / Off | On | Enables or disables automatic IP address assignment using DHCP. |
| Static Addresses | Status | - | Shows the manually configured static IP addresses. |
| Add IP Address | Action | - | Opens a dialog for adding a static IP address and subnet mask or prefix. |
| Restore Factory Defaults | Toggle | Off | Restores the IP configuration of the interface to its factory defaults. |
Add Static IP Address
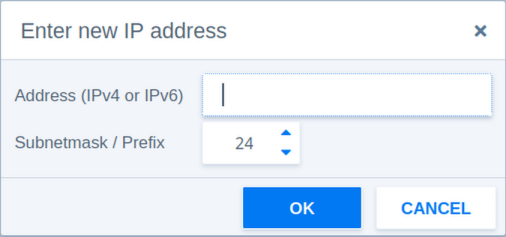
The following parameters are available when adding a static IP address manually.
| Parameter | Values | Default | Description |
|---|---|---|---|
| Address | IPv4 or IPv6 | - | Defines the static IP address. |
| Subnetmask / Prefix | 3-127 | 24 | Defines the network prefix length or subnet mask. |
| Prefix Example 1 | 24 | - | Corresponds to the IPv4 subnet mask 255.255.255.0. |
| Prefix Example 2 | 16 | - | Corresponds to the IPv4 subnet mask 255.255.0.0. |
Interfaces: Gateway
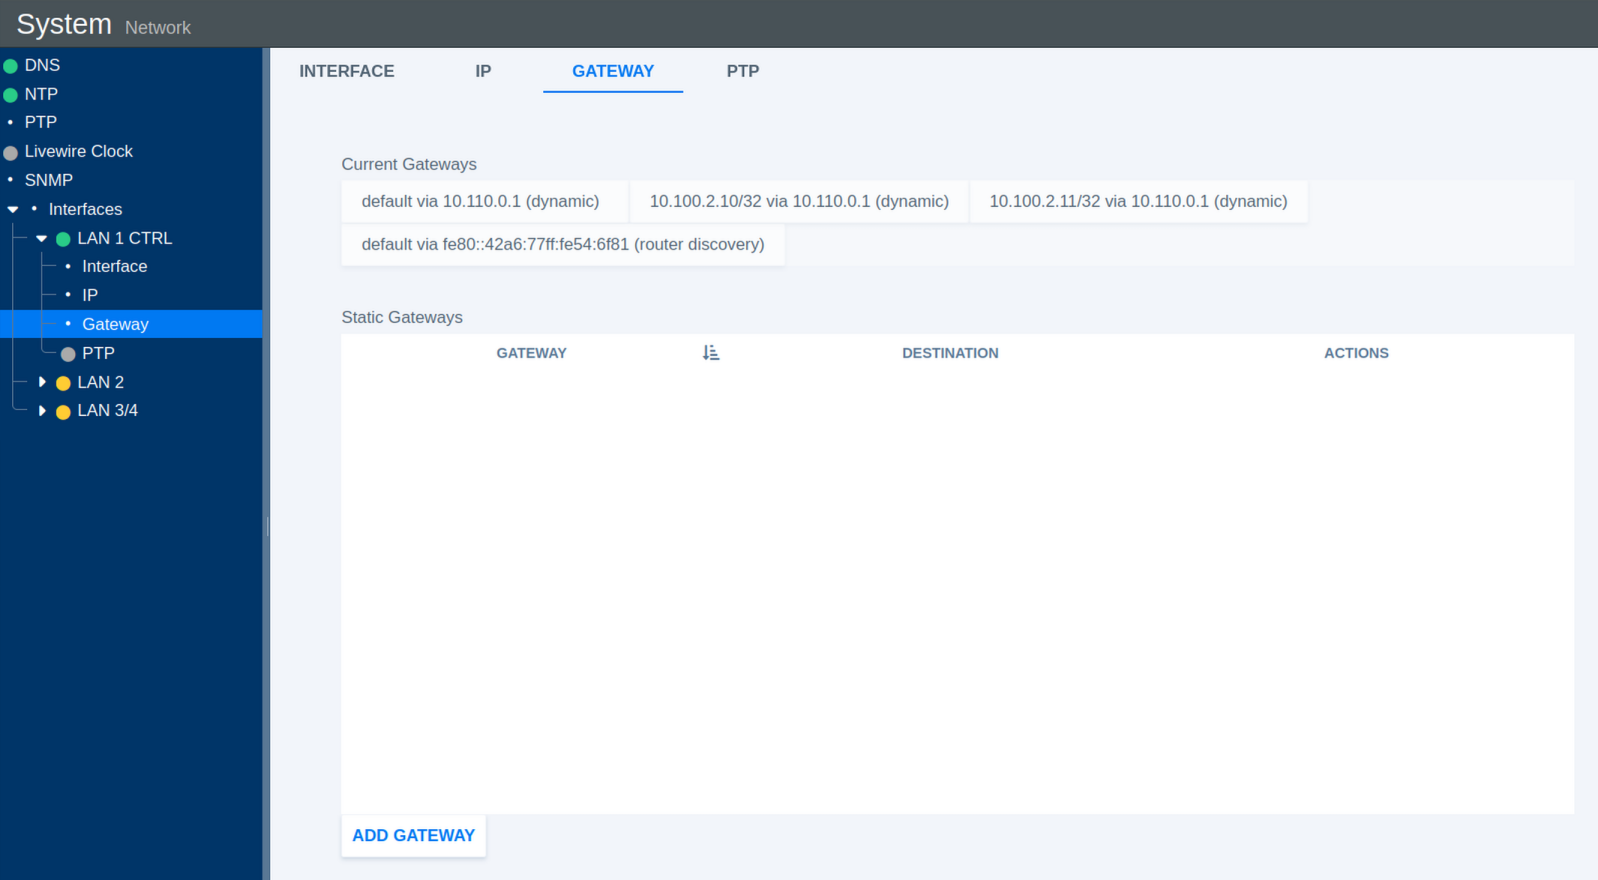
This section configures network gateways for the selected interface.
| Parameter | Values | Default | Description |
|---|---|---|---|
| Current Gateways | Status | - | Shows all currently active gateway addresses. |
| Static Gateways | Status | - | Shows manually configured static gateway addresses. |
| Add Gateway | Action | - | Opens a dialog for adding a static gateway. |
Add Static Gateway
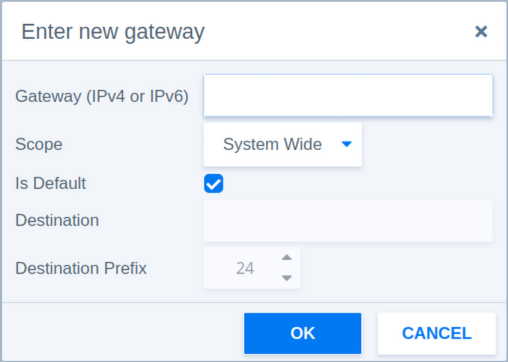
The following parameters are available when adding a static gateway manually.
| Parameter | Values | Default | Description |
|---|---|---|---|
| Gateway | IPv4 or IPv6 | - | Defines the gateway IP address. |
| Scope | System Wide / Link Specific | System Wide | System Wide makes the gateway available system-wide. Link Specific associates the gateway with the selected network interface only. |
| Is Default | Checkbox | - | Sets this gateway as the default route for traffic that does not match a more specific route. |
| Destination Prefix | 3-127 | 24 | Defines the network prefix length of the destination route. |
Interfaces: PTP
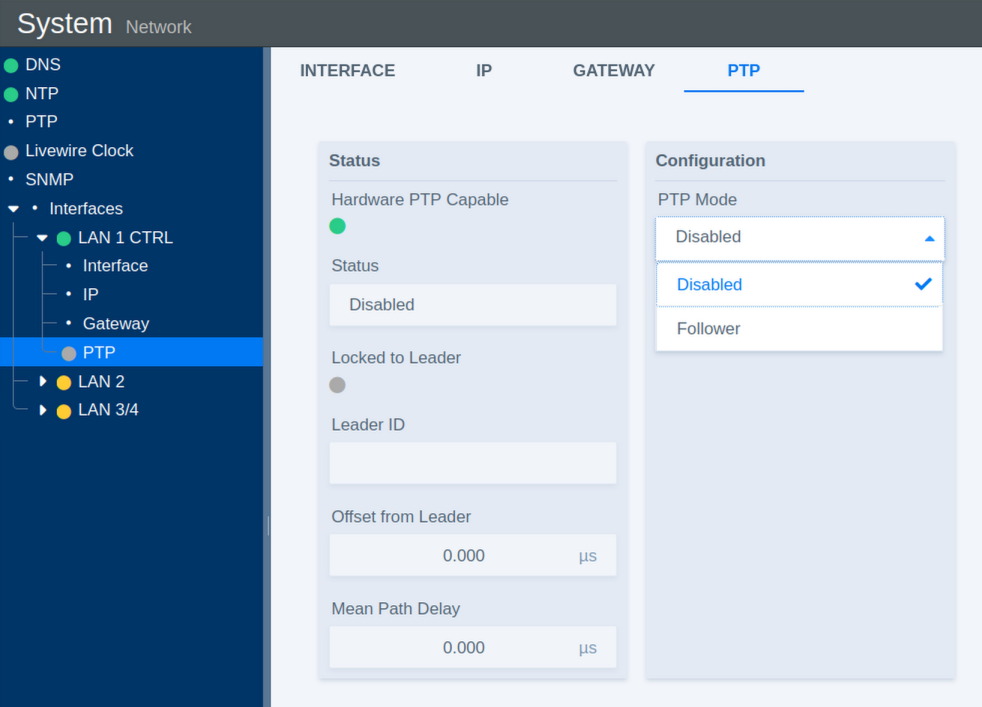
The PTP section configures Precision Time Protocol synchronization for the selected network interface.
| Parameter | Values | Default | Description |
|---|---|---|---|
| Status | Error / Enabled / Disabled | Disabled | Shows the current operational state of PTP synchronization. |
| Locked to Leader | Indicator | - | Indicates whether the system is successfully synchronized to a PTP Leader Clock. |
| Leader ID | Status | - | Shows the identifier of the current PTP Leader Clock. |
| Offset from Leader | Status | - | Shows the time deviation from the Leader Clock in nanoseconds. |
| Mean Path Delay | Status | - | Shows the measured mean network path delay for PTP communication. |
| PTP Mode | Disabled / Follower | Follower | Disabled turns off PTP synchronization on this interface. Follower synchronizes the system to an external PTP Leader Clock. |
PTP Clock Settings
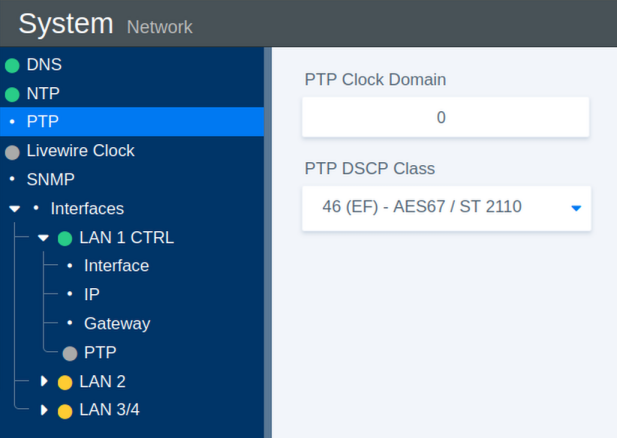
These parameters define the general PTP clock settings.
| Parameter | Values | Default | Description |
|---|---|---|---|
| PTP Clock Domain | 0-127 | 0 | Defines the PTP domain number. Only PTP devices operating in the same domain participate in the same synchronization instance. |
| PTP DSCP Class | 0-63 | 46 | Defines the Differentiated Services Code Point (DSCP) used to prioritize PTP network traffic. |
Certificates
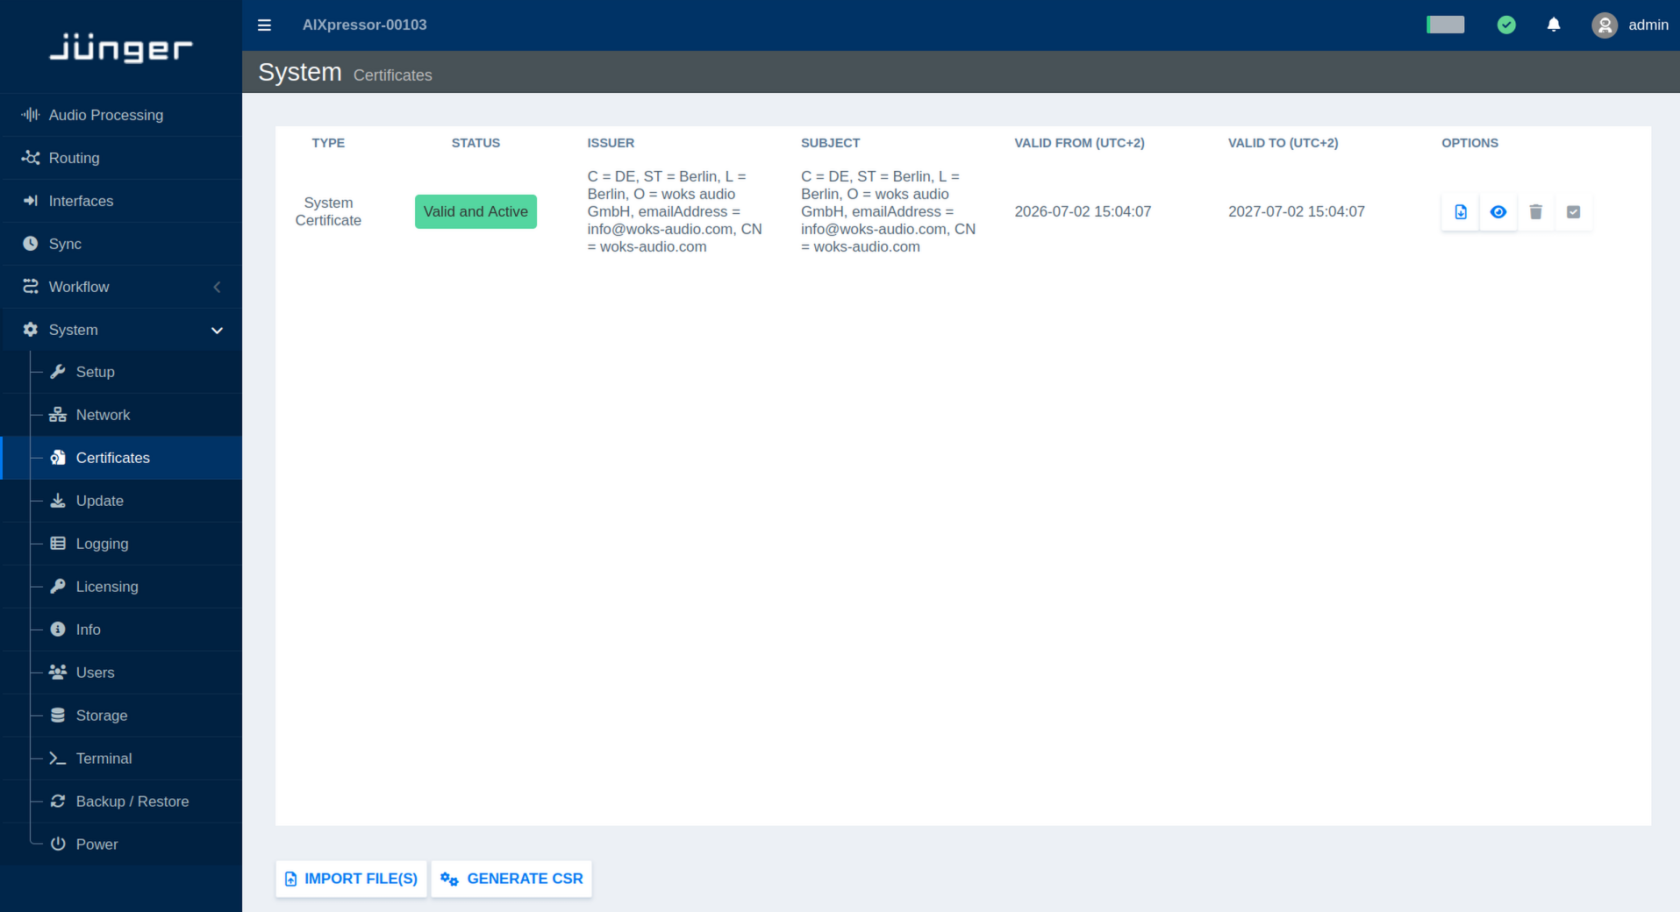
If your flexAI system is connected to an open or untrusted network, we recommend using encrypted communication.
Starting with flexAI version 2023-12r1, secure client-server communication via HTTPS is supported. HTTPS uses TLS to encrypt the communication between the flexAI system and a client, such as a web browser or other software.
For HTTPS connections, the flexAI system provides a server certificate that allows the client to verify the server's identity and establish an encrypted connection.
Open the Certificates page to view and manage the certificates installed on the system.
By default, flexAI uses a self-signed certificate. Since this certificate is not issued by a trusted certificate authority (CA), web browsers may display a security warning when connecting to the system.
If your network uses a Certificate Authority (CA), you can generate a CSR (Certificate Signing Request) and have it signed by your CA.
Alternatively, you can import a certificate that includes the flexAI system's IP address and/or DNS name in its Subject Alternative Name (SAN) entries. If the issuing CA is trusted by the client, browsers can establish the HTTPS connection without displaying certificate warnings.
You can also download the currently installed certificate or display its details directly on the Certificates page.
Update
Select Update from the System menu to manage software updates and installed applications.
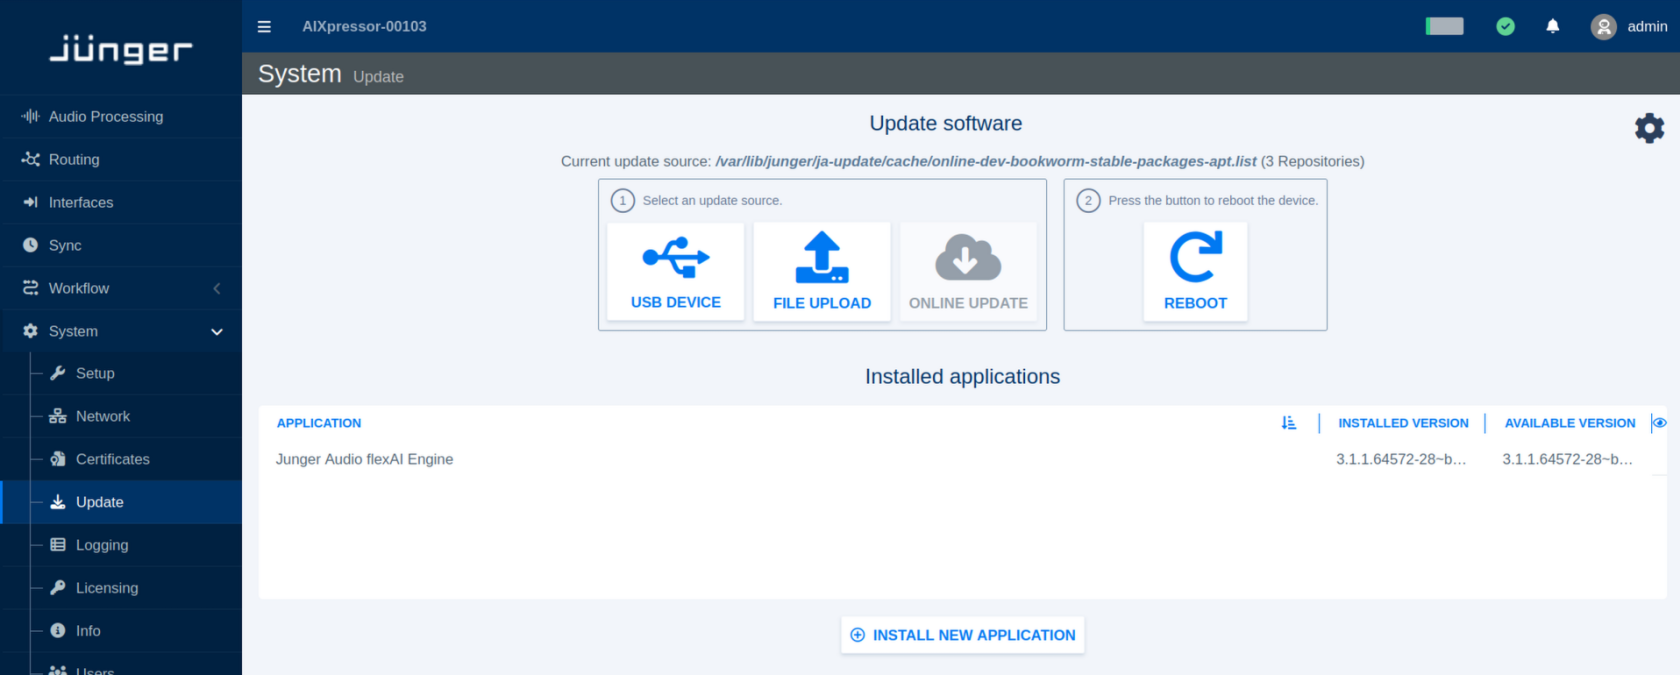
By default, the Update page provides a simplified workflow for updating the flexAI system. For installations that require more detailed package management, an Advanced View is also available.
Updating the System
In the standard view, first select the source from which the software update should be loaded:
-
USB Device – use an update available on a connected USB storage device.
-
File Upload – upload an update file from the computer running the web browser.
-
Online Update – retrieve an update from the configured online update source, if available.
After selecting the appropriate update source, follow the instructions shown on the page. The system can then be rebooted using Reboot as part of the update procedure.
The Installed applications section lists the applications currently installed on the flexAI system together with their installed and, where available, newer software versions.
Use Install New Application to add an application that is not currently installed.
Update Settings
Click the settings icon in the upper-right corner of the Update page to open the update settings.
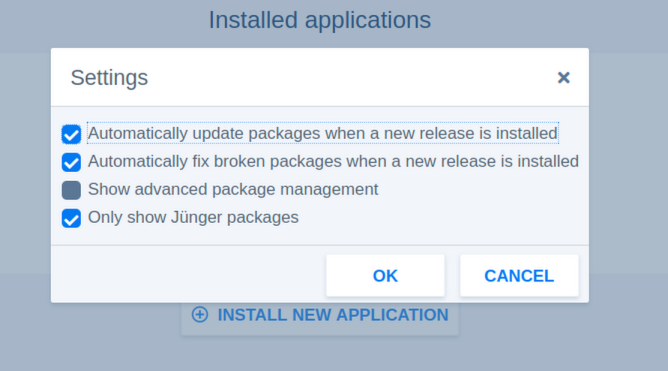
The following options are available:
-
Automatically update packages when a new release is installed – updates installed packages automatically when installing a new software release.
-
Automatically fix broken packages when a new release is installed – attempts to repair package inconsistencies as part of a release installation.
-
Show advanced package management – enables the Advanced View described below.
-
Only show Jünger packages – limits the displayed package list to Jünger Audio packages.
For normal operation, the simplified update view is generally sufficient. Enable advanced package management when individual packages need to be inspected or managed separately.
Advanced View
When Show advanced package management is enabled, the Update page provides direct access to the individual software packages available from the configured update source.
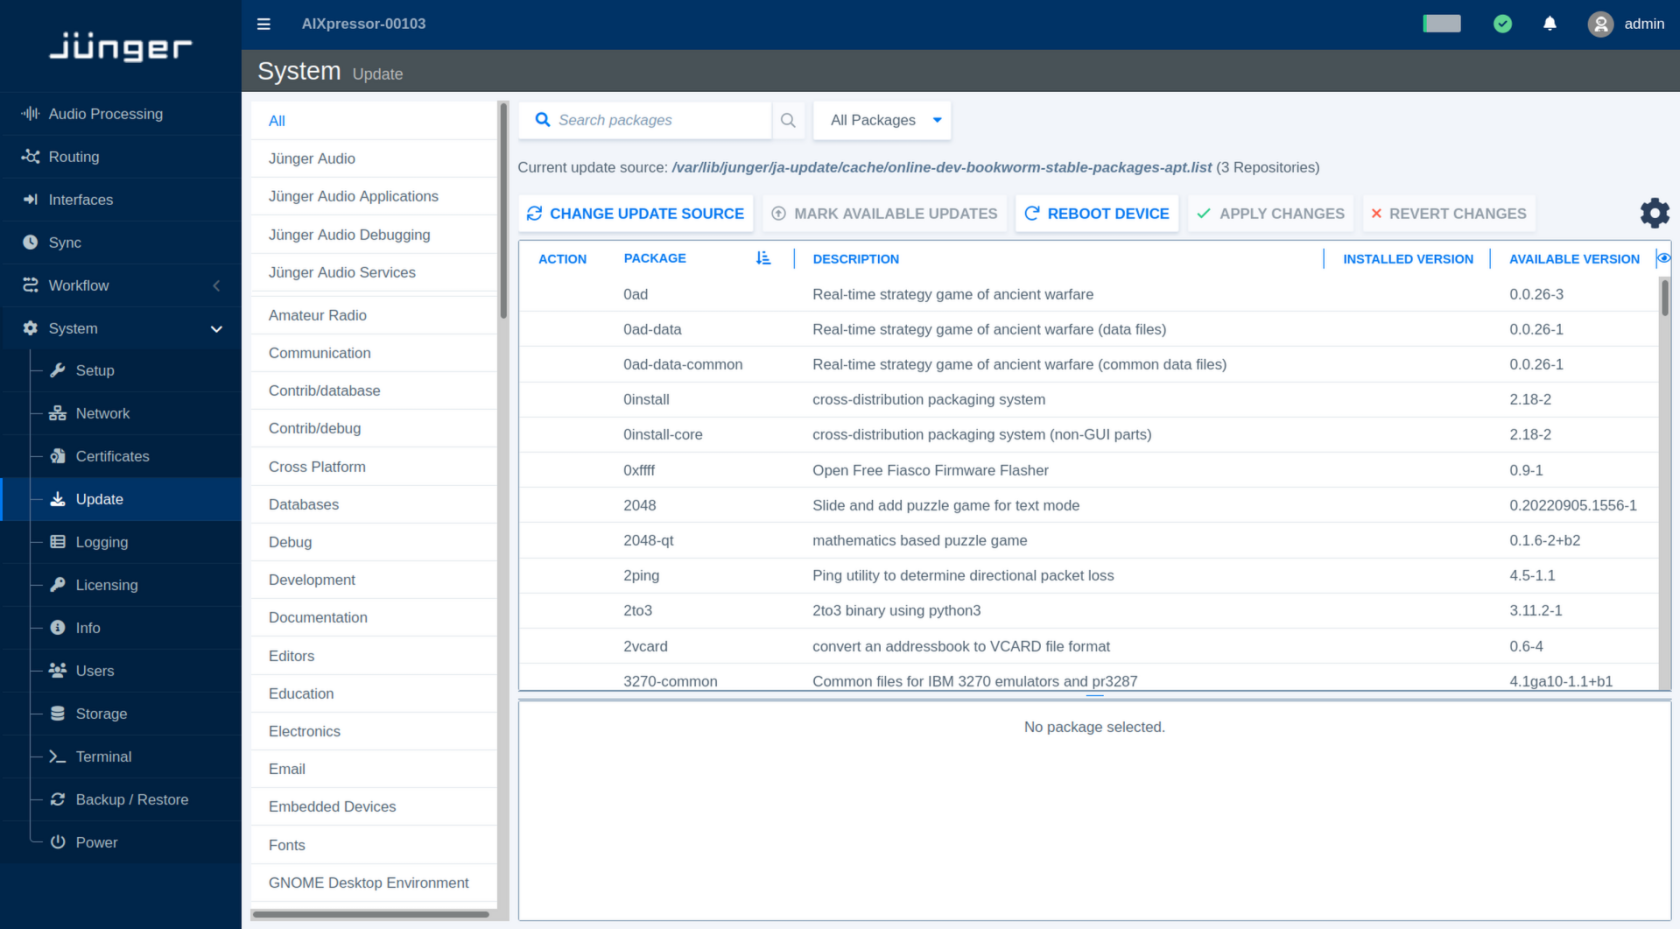
Use the category list, package search field, and package filter to locate specific packages. The package table shows information such as the Package name, Description, Installed Version, and Available Version.
The toolbar provides the following package management functions:
-
Change Update Source – selects or changes the source from which package information and updates are obtained.
-
Mark Available Updates – marks packages for which newer versions are available.
-
Apply Changes – applies the currently selected package changes.
-
Revert Changes – clears changes that have been selected but not yet applied.
-
Reboot Device – restarts the flexAI system when required after an update or package change.
Selecting a package provides additional information and available actions in the lower part of the page.
The Advanced View is intended for installations where individual package management is required. For regular flexAI software updates, use the standard update workflow whenever possible.
Logging
flexAI provides a comprehensive logging system based on information available from the underlying Linux operating system. Log data may include messages from the Linux kernel, system services, I/O operations, and user applications. This information is stored locally on the system and can be used for later analysis.
Select Logging from the System menu to view the available log files.
The log files can be viewed directly in flexAI. Their contents are primarily intended for diagnostics and troubleshooting, for example when working with customer support. The list can be filtered for the severity of a message or to a specific app in the system.
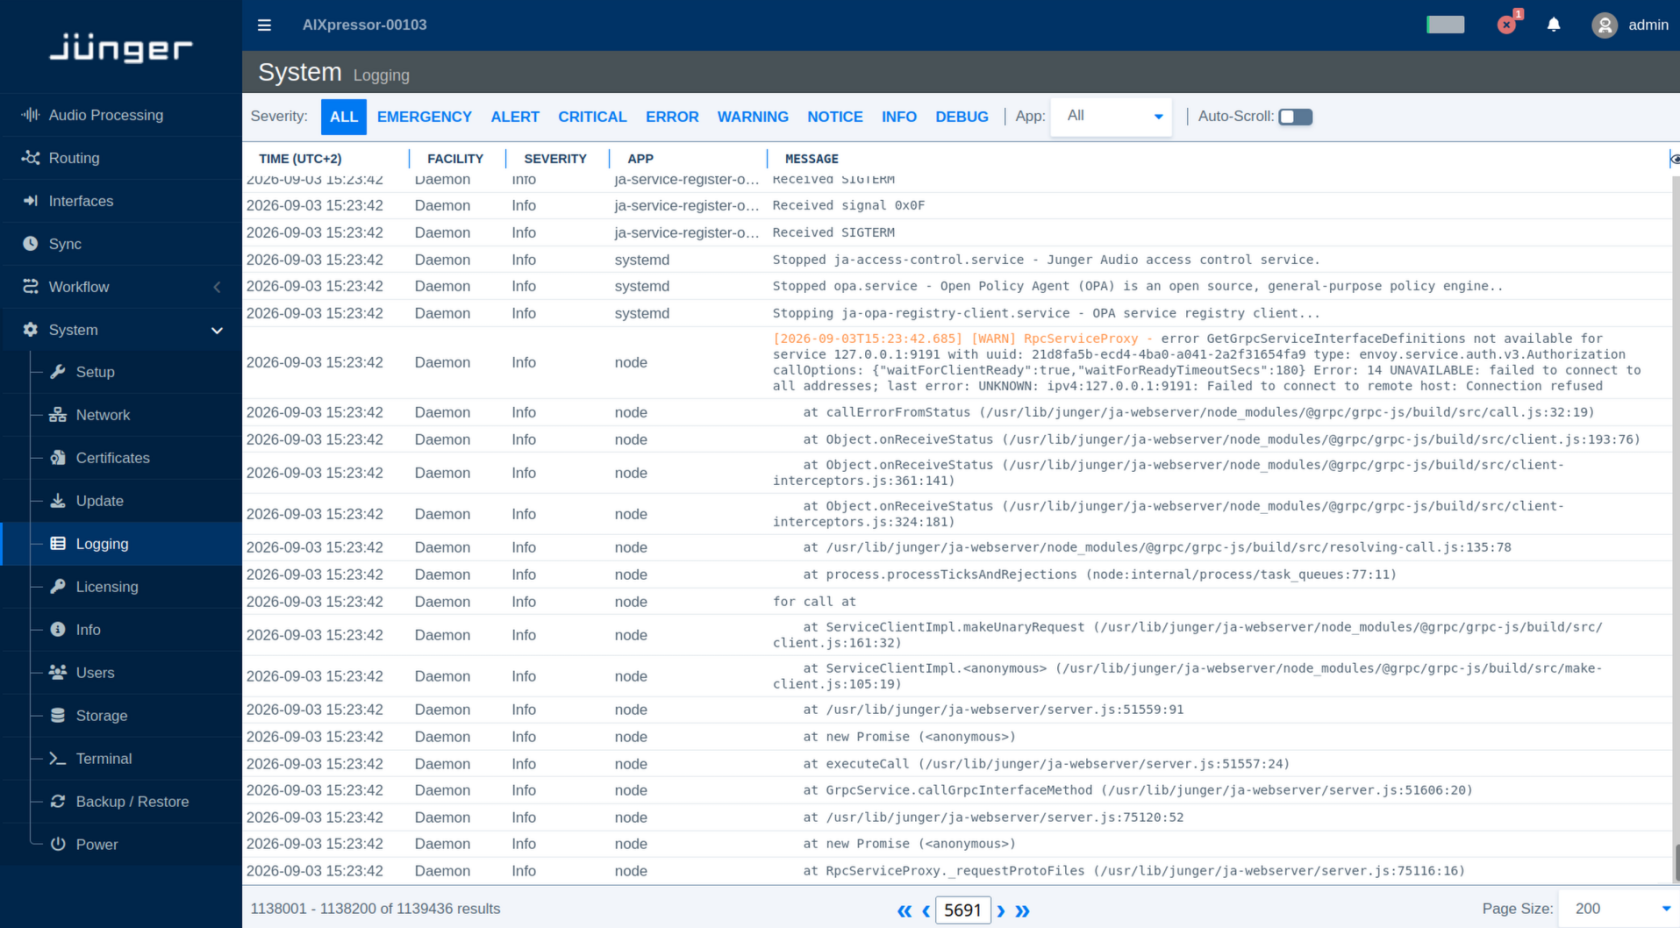
For further troubleshooting, a Diagnostics File containing additional system information can be downloaded from System > Info
Licensing
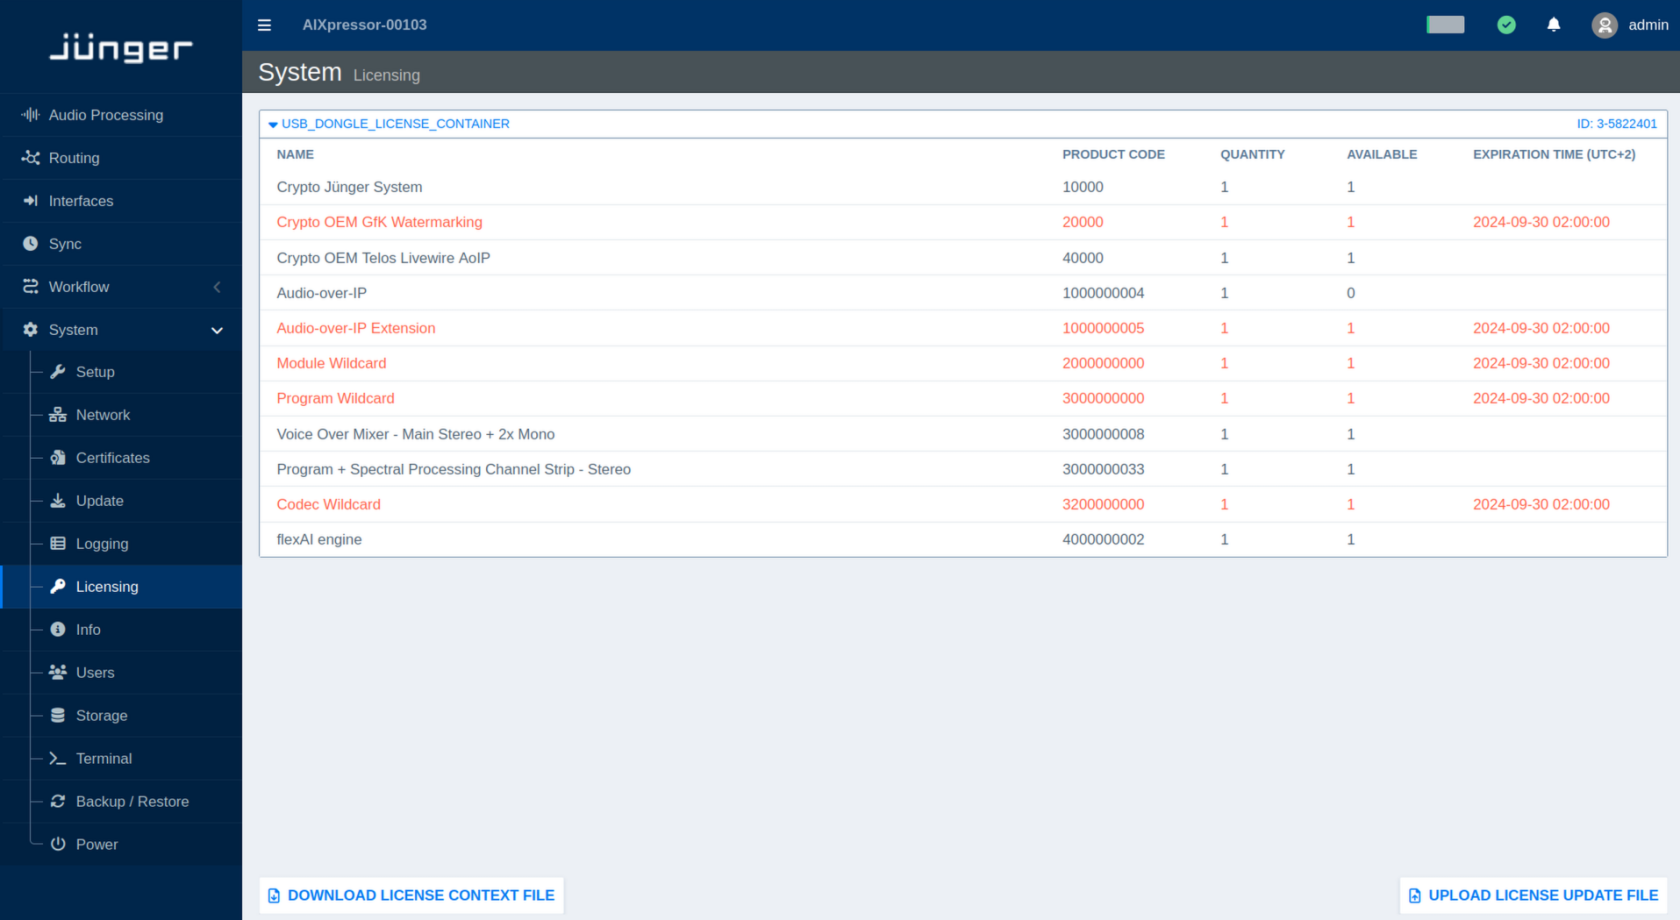
flexAI systems use licenses to enable the flexAI engine as well as additional audio processing components, interfaces, and other optional features. Depending on the installation, licenses may be provided locally via a USB license dongle or centrally through a Wibu license server.
Select Licensing from the System menu to view the currently installed licenses.
The Product Name and Product Code identify each licensed product or feature. Quantity shows the total number of licenses available for that product, while Available shows how many of these licenses are currently not in use.
Some licenses, such as licenses provided for demonstrations or evaluations, are valid for a limited period. For these licenses, an Expiration Time is shown on the Licensing page. After this date, the corresponding licensed feature is no longer available unless the license is renewed or replaced.
When purchasing or activating additional licenses, you may be asked to provide a License Request. To create it, use Download License Context File in the lower-left corner of the Licensing page. The downloaded file contains the license context information required to generate the corresponding license update.
Once you receive the License Update File, use Upload License Update File in the lower-right corner of the page to install or update the licenses on the flexAI system.
Info
The Info page provides an overview of the current status, system load, installed components, and software versions of the flexAI system.
The page is organized into five sections:
-
System Status
-
Hardware Status
-
Software Status
-
System Load
-
About
System Status
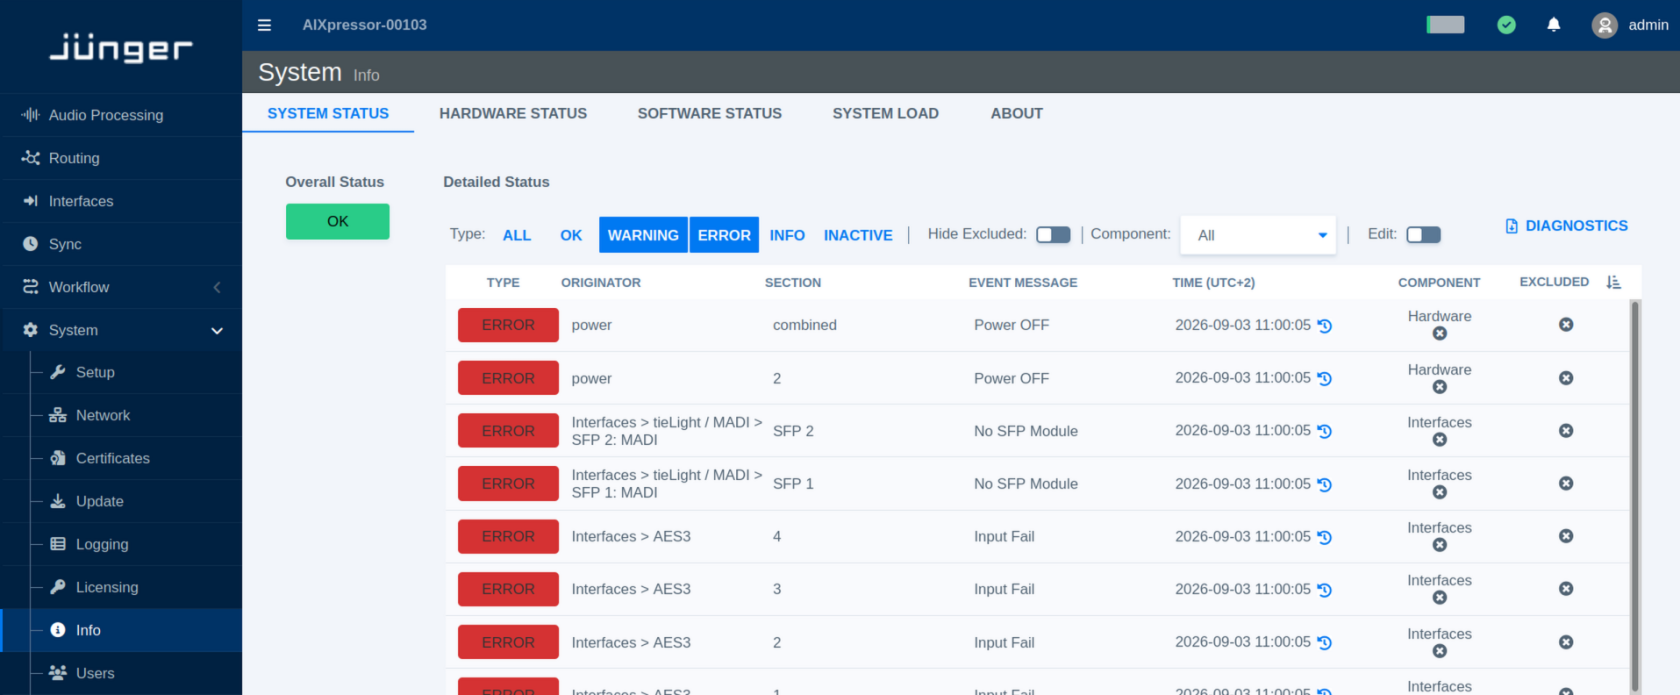
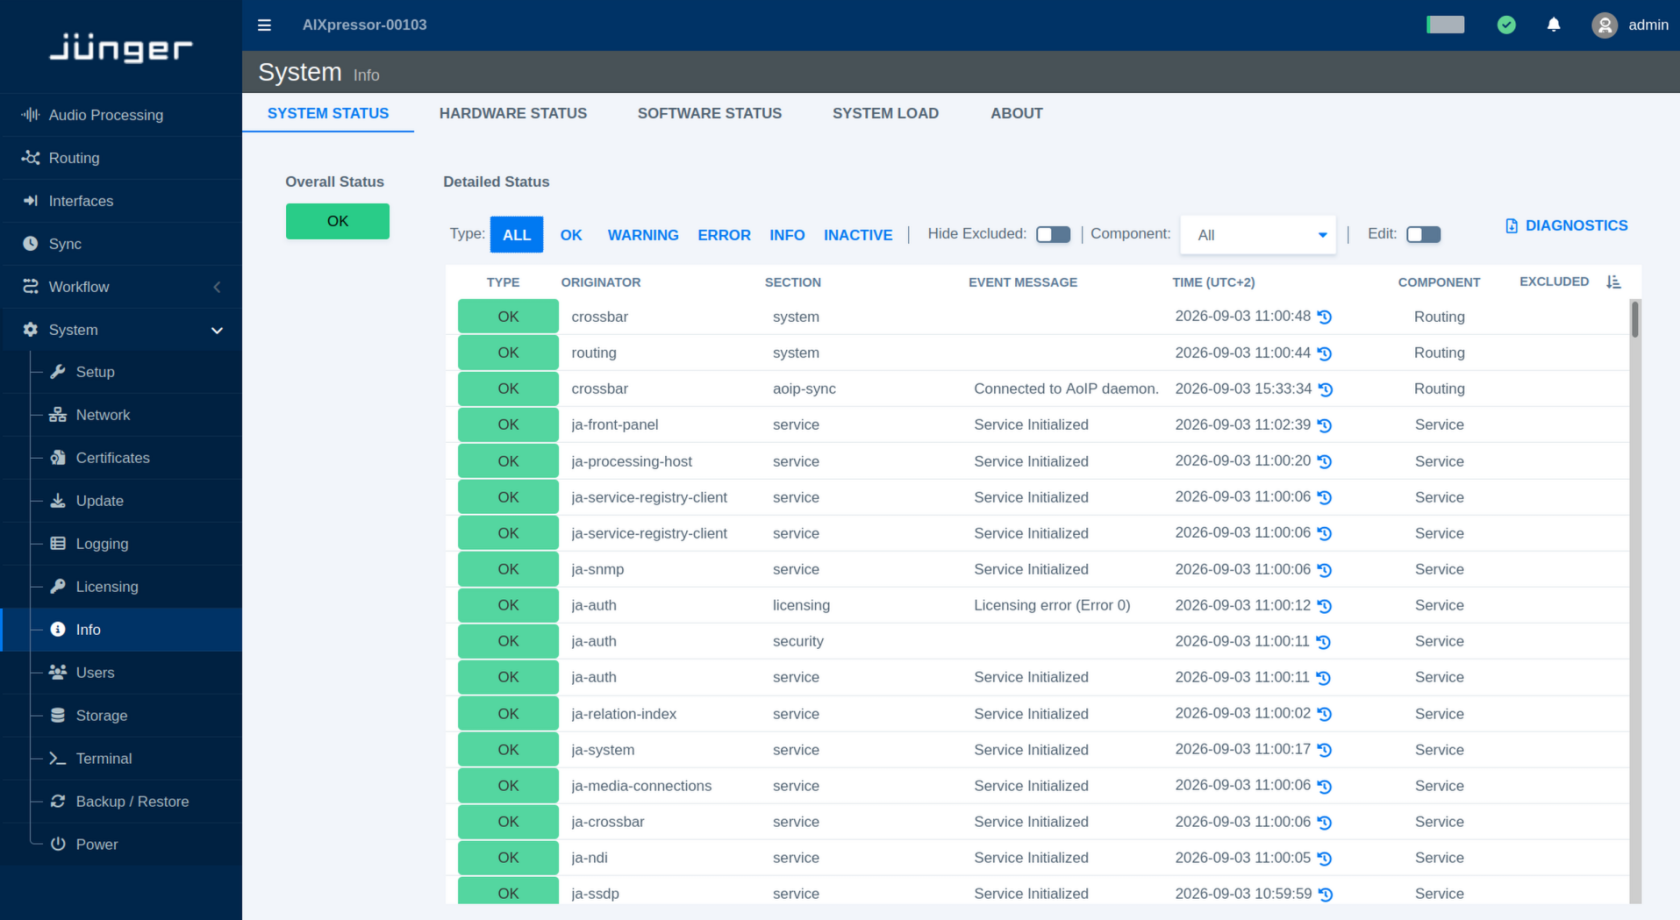
Select Info from the System menu to open the Info page. The System Status section is displayed by default.
The Overall Status indicator shows the general operational state of the flexAI system. A green OK status indicates that the system is operating normally overall. Individual components may still report informational messages, inactive states, or non-critical warnings.
The Component drop-down menu allows you to filter the status information by component group. Available groups include All, Service, System, Hardware, Audio Processing, Routing, Sync, Network, and Interfaces.
Use Edit to customize how individual status entries are handled. A status can be excluded from the calculation of the Overall Status, so that changes to this status no longer affect the general system status indication. Status entries that are not relevant for a particular installation can also be hidden completely from the System Status view (Hide Excluded).
These settings allow the status overview to be adapted to the requirements of a specific system without disabling the underlying status monitoring.
Each individual status entry provides access to its history. Click the history icon next to a status to open the Status History dialog. The dialog lists previous state changes together with their timestamp, status type, event message, and any available details. It also identifies the corresponding originator, section, and component.
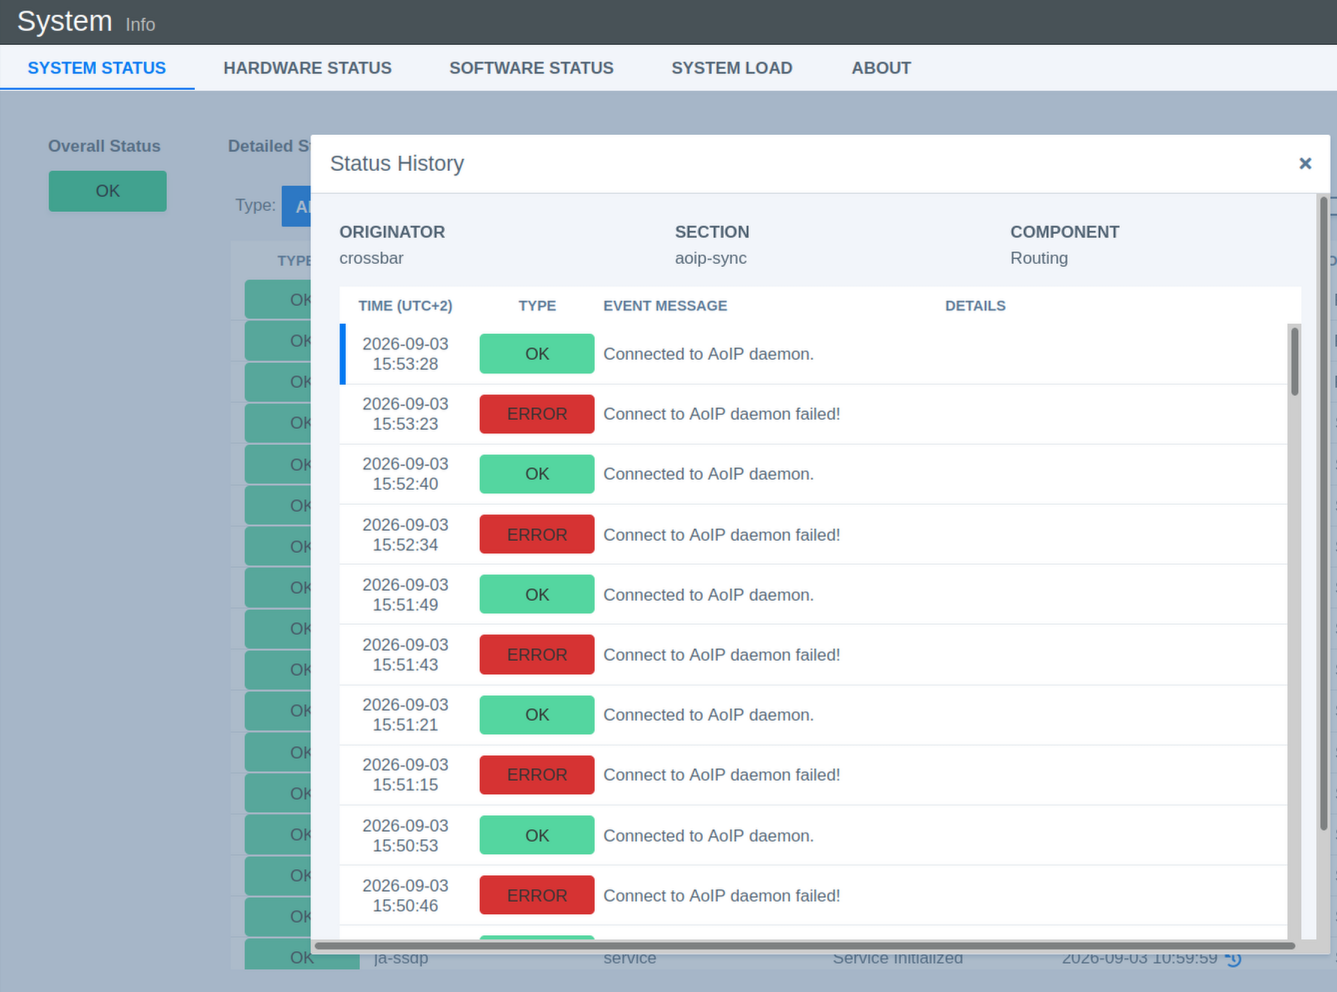
This history can be useful when investigating intermittent issues, as it allows you to see when a status changed and whether it subsequently returned to its normal state.
Diagnostics File
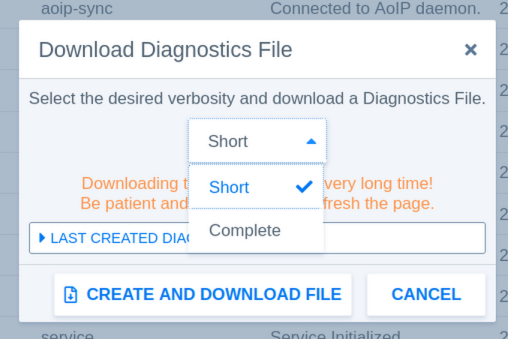
Click Diagnostics on the Info page to open the Download Diagnostics File dialog.
Select the desired level of detail:
- Short creates a smaller diagnostics file containing the information typically required for troubleshooting.
- Complete collects more extensive diagnostic information and may take considerably longer to create.
Click Create and Download File to generate and download the Diagnostics File. When creating a Complete file, keep the page open until the process has finished.
If a Diagnostics File has already been created, information about the most recently created file is also available in the dialog.
Hardware Status
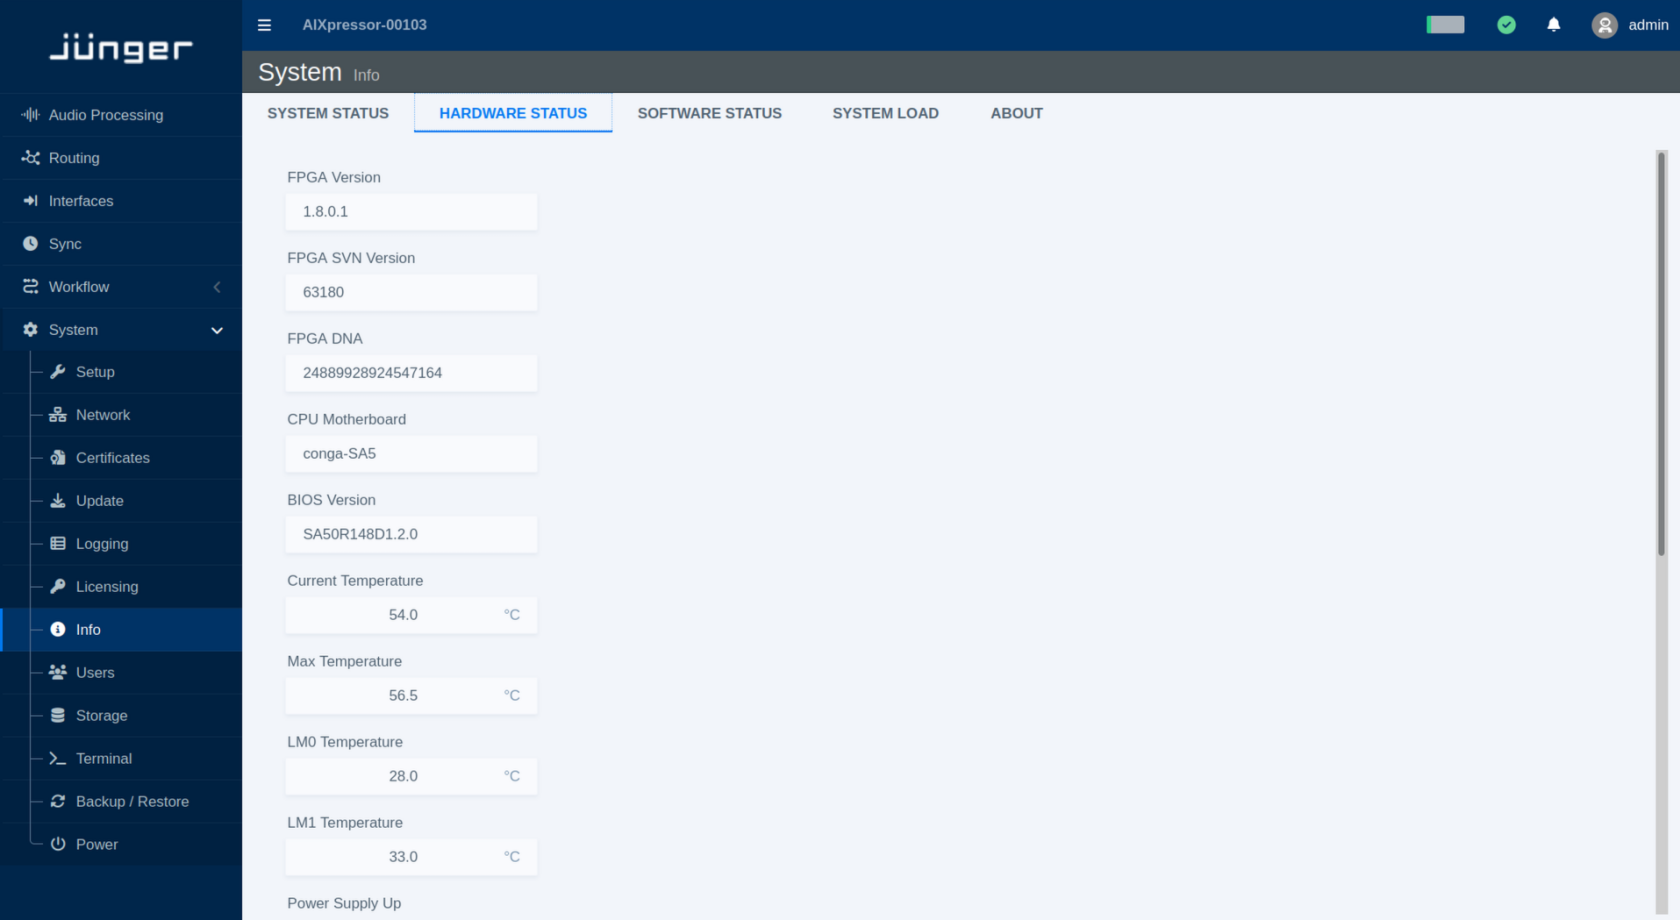
The Hardware Status section provides detailed information about the hardware components of the flexAI system. It is primarily intended for diagnostics and service purposes.
Depending on the system, the displayed information may include firmware versions, temperatures, fan status, and power supply status.
Software Status
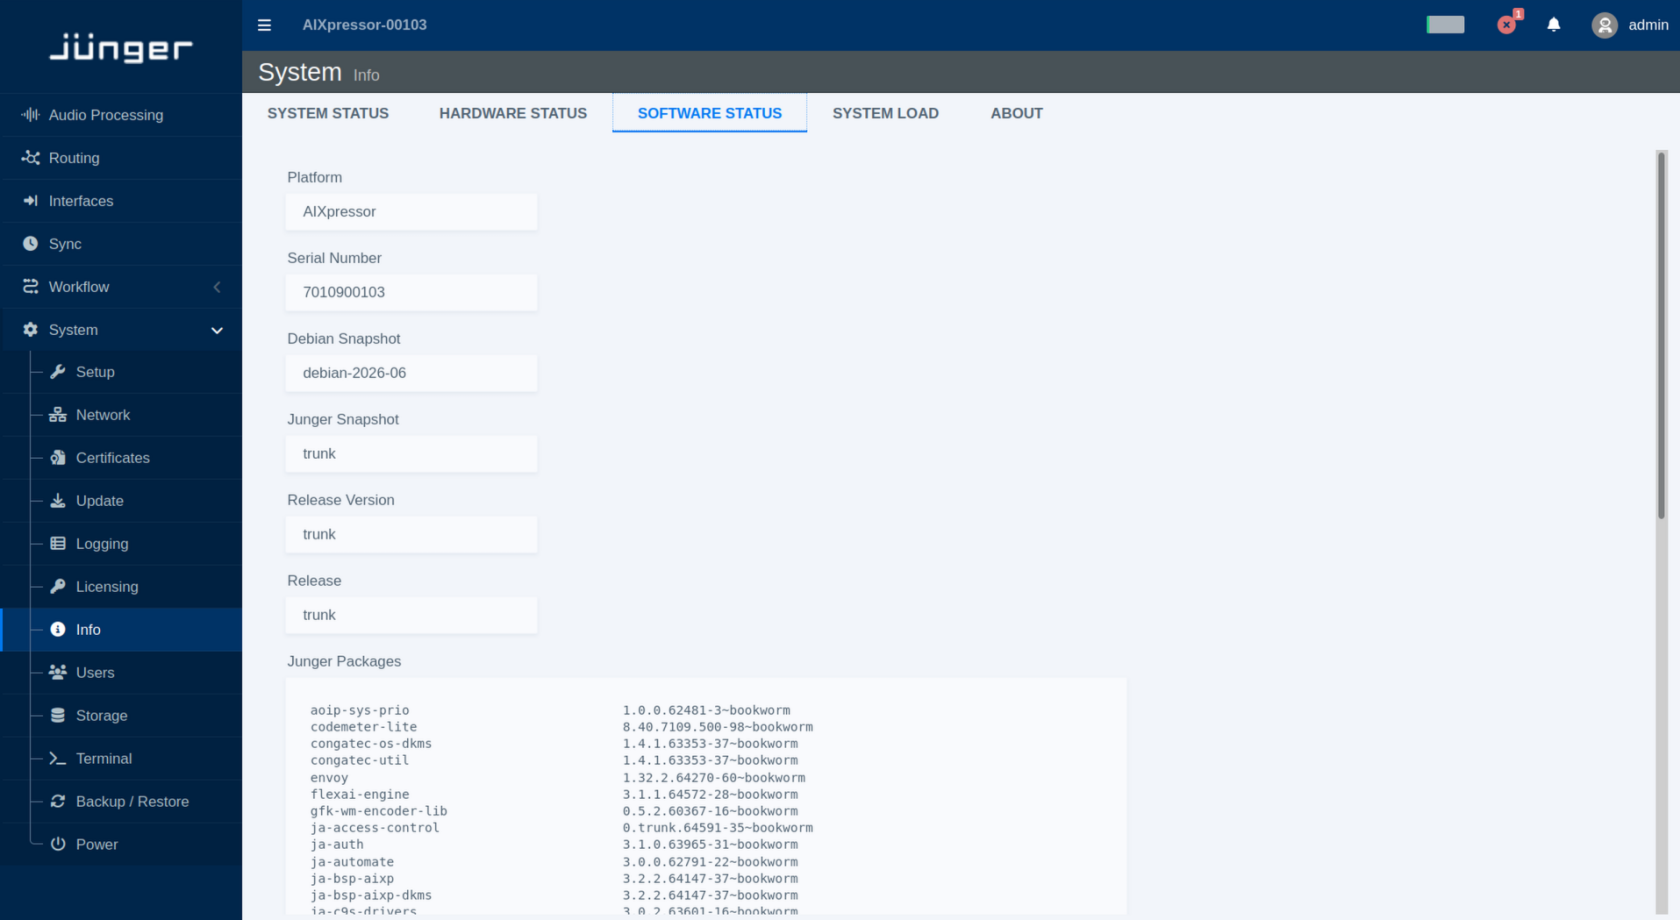
The Software Status section lists information about the software components and versions currently installed on the flexAI system.
System Load
The System Load section provides an overview of the current processing load of the flexAI system.
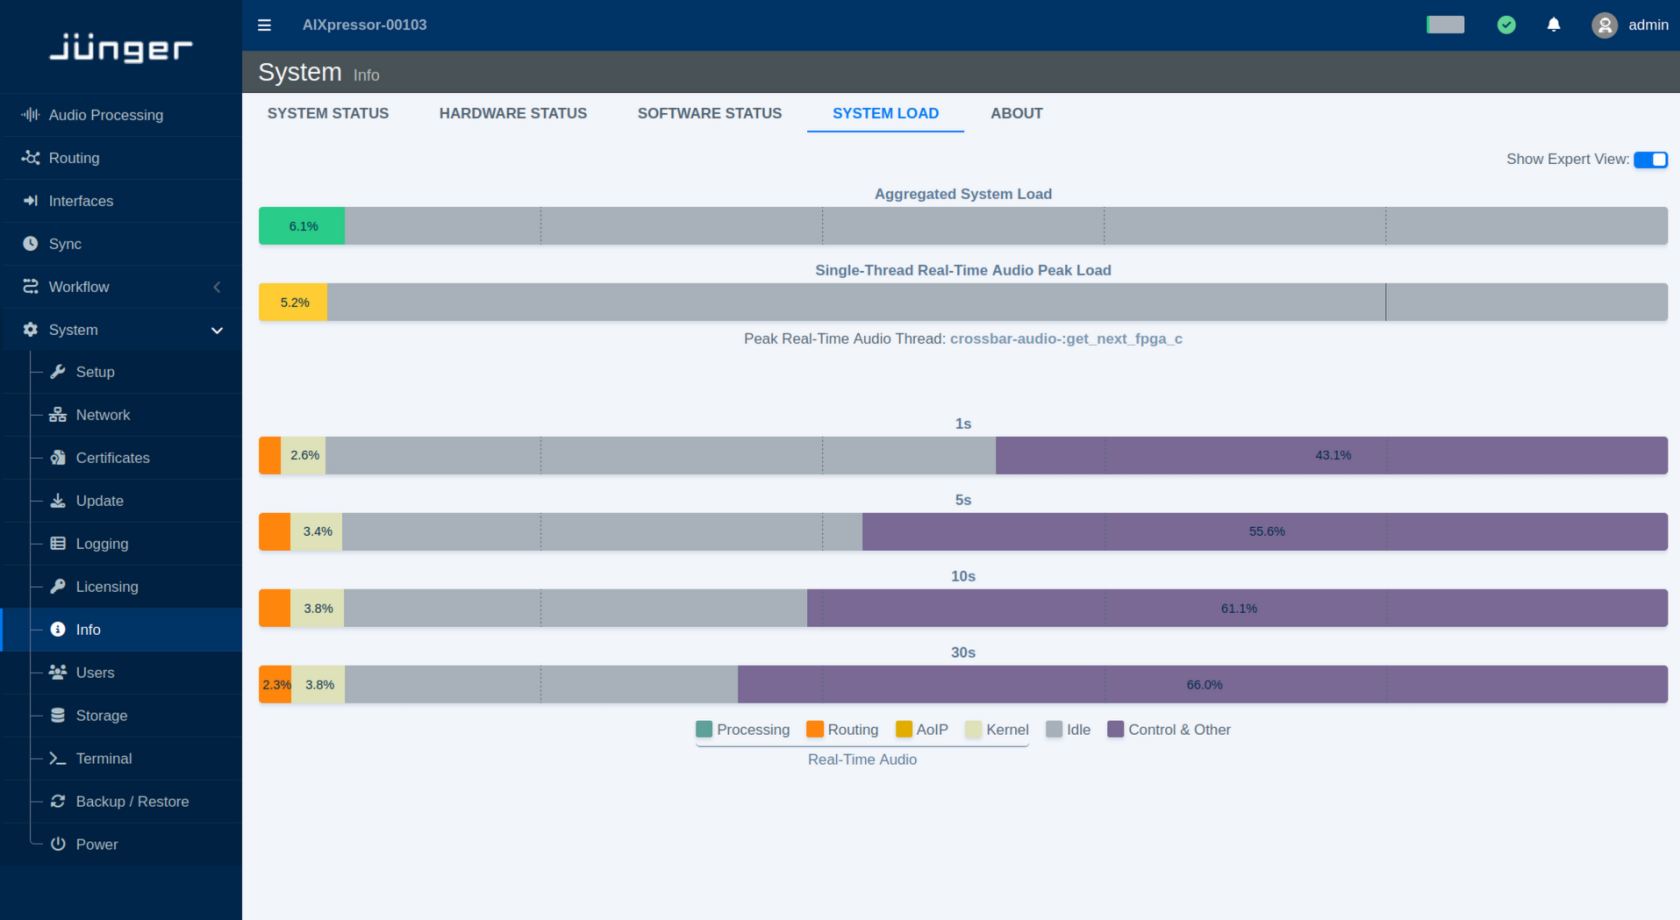
Aggregated System Load shows the overall system load and provides a quick indication of the available processing capacity.
Enable Show Expert View to display more detailed load information. The Single-Thread Real-Time Audio Peak Load shows the peak load of an individual real-time audio processing thread.
The Expert view also provides four system load bars with integration times of 1 s, 5 s, 10 s, and 30 s. Each bar is divided into color-coded sections showing how the system load is distributed across the following functions:
-
Processing
-
Routing
-
AoIP
-
Kernel
-
Real-Time Audio
-
Idle
-
Control & Other
The different integration times provide views of the system load over different time periods. Shorter integration times make brief changes in load more visible, while longer integration times provide a more stable view of the overall load distribution.
Users
The Users page is currently provided for informational purposes only.
User role and permission management will be added in an upcoming flexAI software update. This will allow administrators to manage user roles and control access to system functions directly from this page.
Storage
The Storage page is currently provided for informational purposes only.
It displays an overview of the system's storage devices, partitions, and their current usage. No storage configuration or management is currently performed from this page.
Terminal
The Terminal page provides access to a web-based Linux terminal on the flexAI system.
Log in using the same credentials as for the regular flexAI user login.
The terminal can be used for standard Linux commands that do not require elevated privileges, for example htop for monitoring system processes and resource usage.
Commands that require sudo or other administrative privileges are not available through the standard user account.
If you are not familiar with the Linux command line, it is best to use the Terminal only when instructed by customer support or another experienced user. Even without administrative privileges, some commands can affect running processes, files, or system behavior.
Backup / Restore
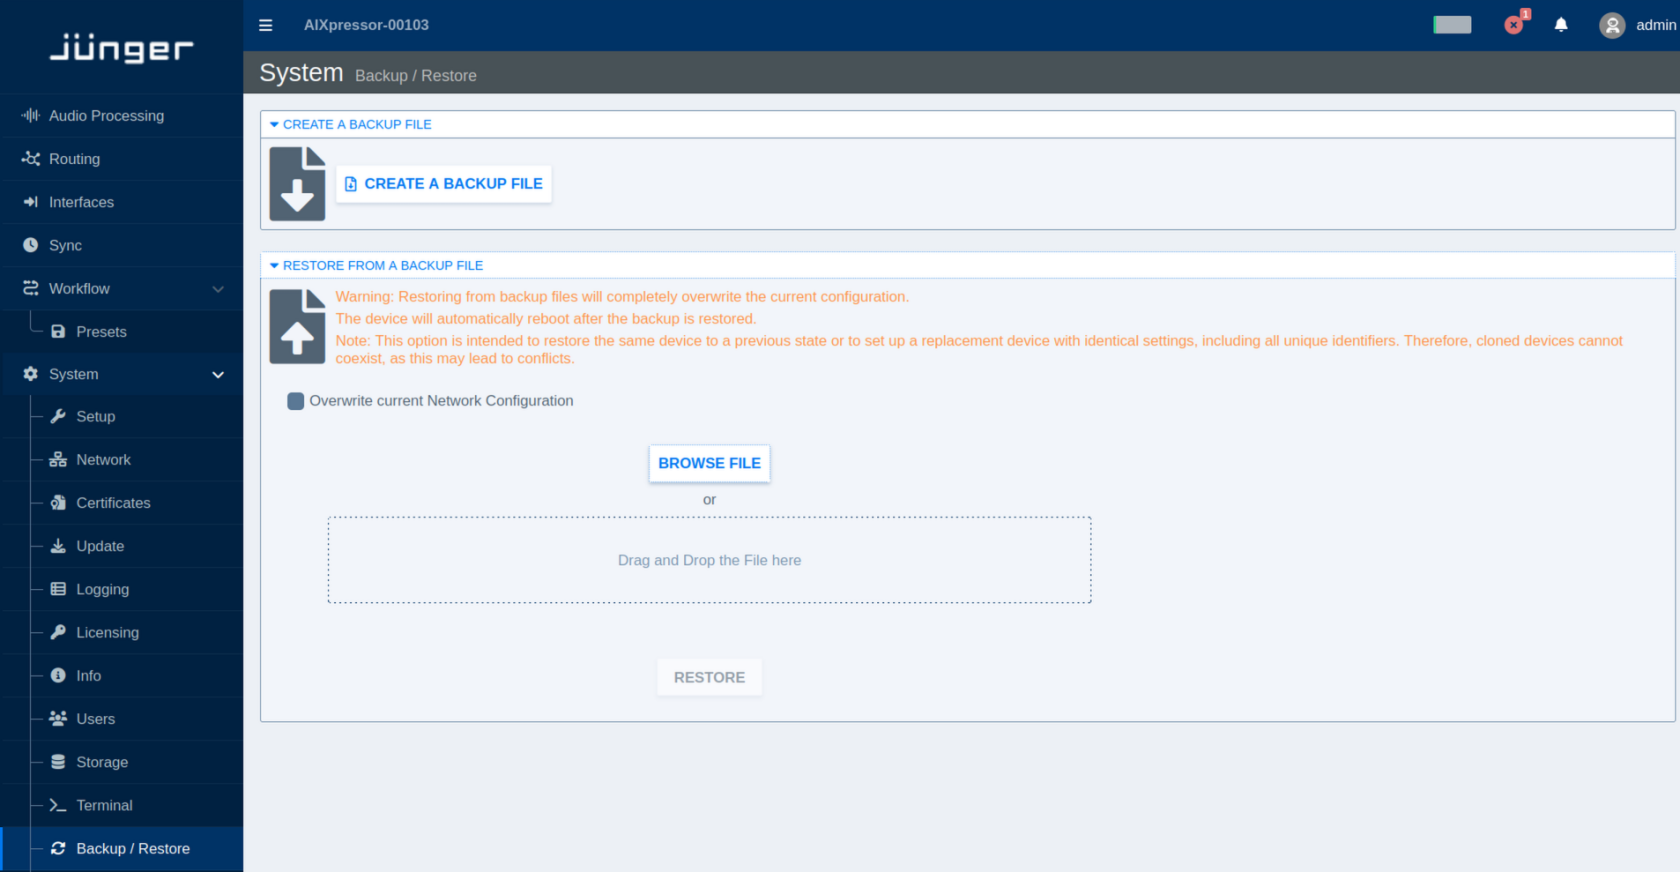
The Backup / Restore page allows you to save the current flexAI configuration to a backup file and restore a previously saved configuration.
Create a Backup
Select Backup / Restore from the System menu.
Click Create a Backup File to generate and download a backup of the current system configuration. Keep backup files in a safe location so that a known configuration can be restored when required.
Restore from a Backup
A backup can be used to restore a flexAI system to a previous configuration or to configure a replacement system with the same settings.
To select a backup file, click Browse File or drag and drop the file into the designated area. Once a valid backup file has been selected, click Restore to start the restore process.
Restoring a backup replaces the current configuration with the configuration stored in the backup file. The flexAI system automatically reboots after the restore process has completed.
By default, the current network configuration is retained. Enable Overwrite current Network Configuration if the network settings stored in the backup should also be restored.
A backup may contain system-specific settings and unique identifiers. Restoring the same backup to multiple systems can therefore result in duplicate identifiers and network or service conflicts. Backup files intended to reproduce a complete system configuration should be used for restoring the original system or for setting up its replacement, rather than for creating multiple simultaneously operated copies.
Power
Select Power from the System menu to access the power controls.
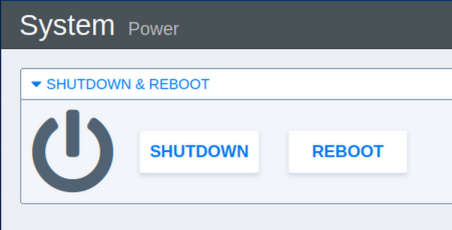
Click Reboot to restart the flexAI system without removing power.
Click Shutdown to shut down the system in a controlled manner. Once the shutdown process has completed, the system can be disconnected from its power source if required.
Use Shutdown before switching off external power supplies or unplugging the system. This allows running services and the operating system to terminate properly and helps avoid incomplete writes or configuration data corruption.