
Software Installation Guide Dell
Installing flexAIserver
This guide describes two methods for installing the flexAIserver software on a supported Dell PowerEdge server:
- Method A: Installation from a bootable USB drive
- Method B: Remote installation using Dell iDRAC Virtual Console and Virtual Media
Both methods use the same flexAIserver installation image. Once the installer has started, the remaining installation procedure is identical.
Prerequisites
Before starting the installation, make sure the following are available:
- flexAIserver ISO image. The ISO may be supplied inside a ZIP archive and must be extracted before use.
- Access to the Dell PowerEdge server.
Required BIOS and iDRAC Settings
Before installing flexAI, verify that the following server settings are configured correctly.
| Necessary Setting |
|---|
| Configuration → BIOS Settings → Boot Settings → Boot Mode = **UEFI** |
| Configuration → BIOS Settings → System Profile Settings = **Performance** |
| Configuration → BIOS Settings → Processor Settings → Virtualization Technology = **Enabled** |
| Storage → Virtual Disks → Layout = **RAID-1** |
| iDRAC Settings → Connectivity → Network → IPv4 Settings → DHCP = **Enabled** |
| iDRAC Settings → Connectivity → OS to iDRAC Pass-through → State = **Disabled** |
For Method A – USB, you also need:
- A USB flash drive
- Physical access to the server
- A keyboard and, if required, a local display
For Method B – iDRAC, you need:
- Access to the Dell iDRAC interface
- Permission to use Virtual Console and Virtual Media
**Important -** Installing flexAIserver erases the selected target disk. Make sure that the correct server and target disk have been selected before continuing.
Method A – USB Drive
1. Create a Bootable USB Drive
Use a suitable image-writing tool such as balenaEtcher to write the flexAIserver ISO image to a USB flash drive:
**Important -** Writing the ISO image erases all existing data on the USB drive.
When the USB drive is ready:
- Insert it into a USB port on the server.
- Connect a keyboard.
- Power on or restart the server.
2. Open the Boot Manager
During server startup, press F11 to open the Dell Boot Manager.
 Dell PowerEdge boot screen – press F11 to open the Boot Manager.
3. Open the One-shot UEFI Boot Menu
Select One-shot UEFI Boot Menu.
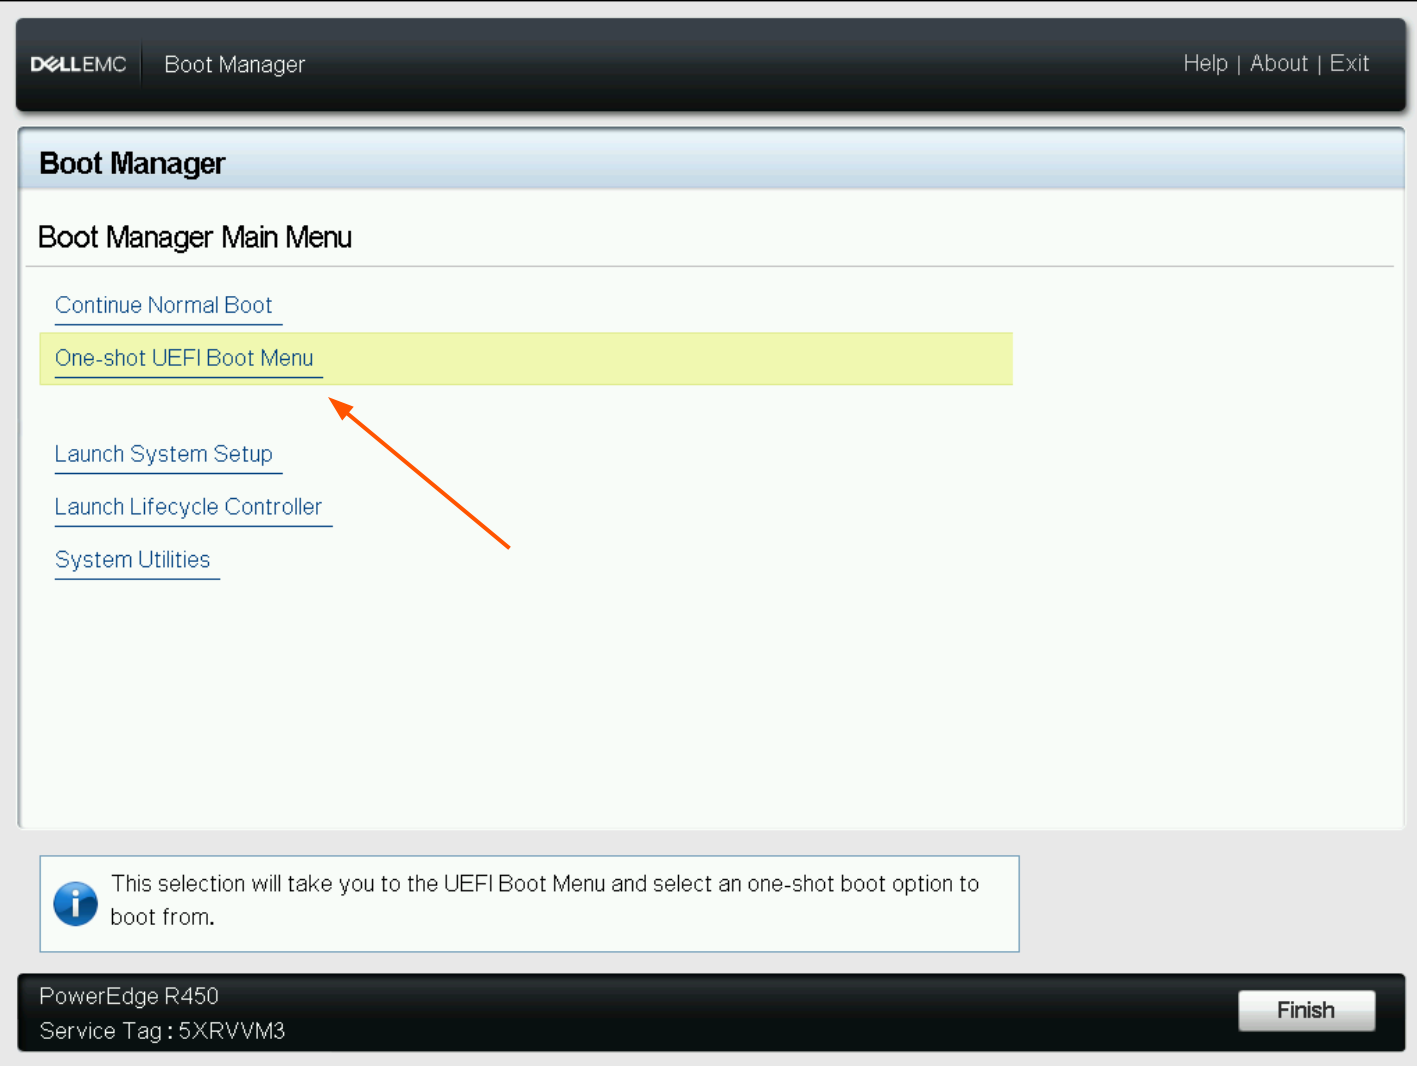 Boot Manager – select One-shot UEFI Boot Menu.
4. Select the USB Drive
In the UEFI boot list, select the entry corresponding to the connected USB drive.
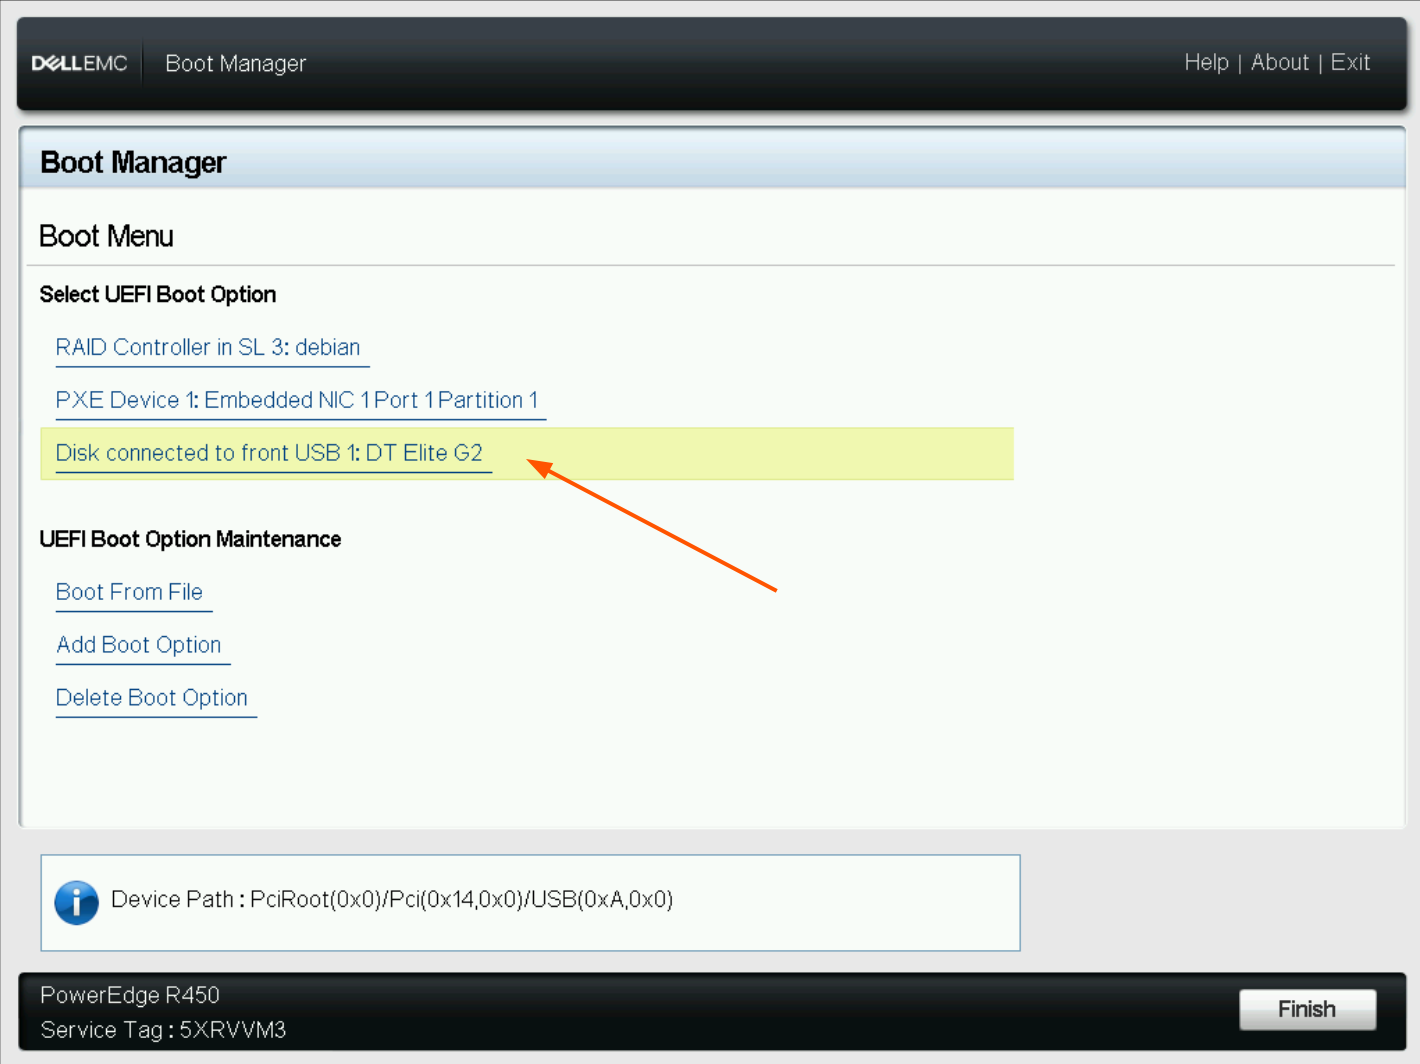 Select the USB installation drive. USB installation only.
Continue with Common Installation Steps below.
Method B – Dell iDRAC Virtual Media
1. Map the ISO as Virtual Media
Open the Dell iDRAC Virtual Console.
In the Virtual Console, open Virtual Media and map the flexAIserver ISO image as a virtual CD/DVD.
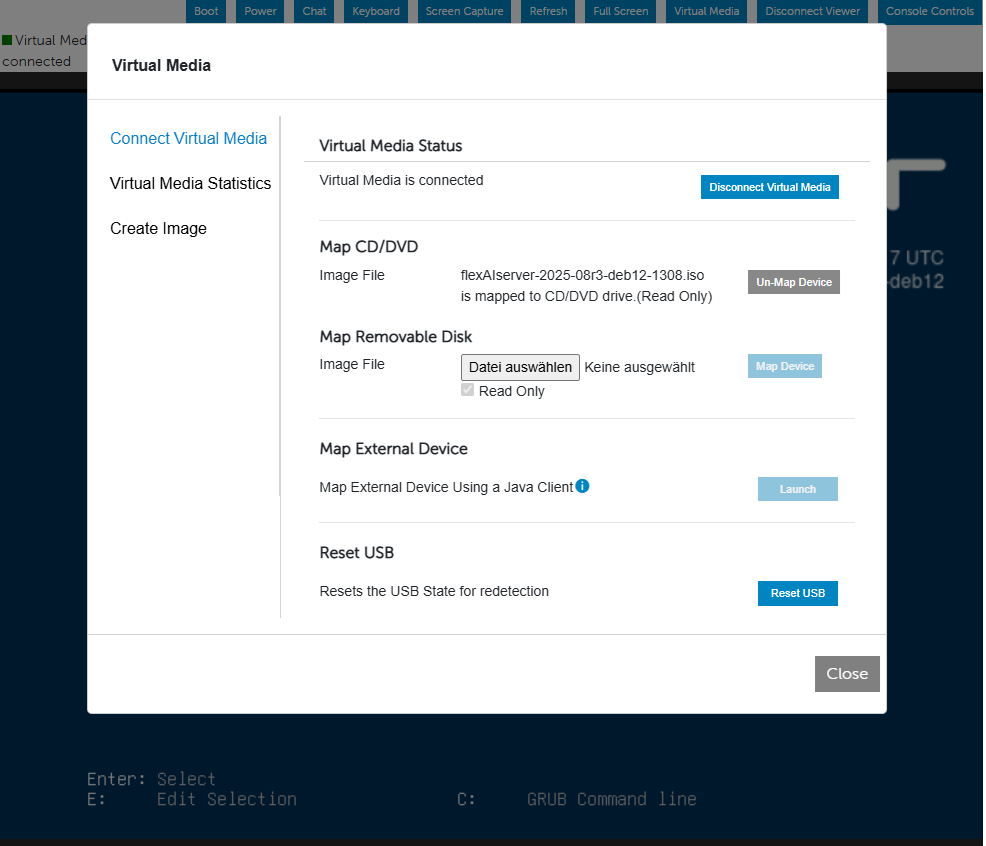 iDRAC – flexAIserver ISO mapped as Virtual CD/DVD. iDRAC installation only.
2. Restart the Server
From iDRAC, select Power > Reset System (warm boot) to restart the server and make the virtual installation media available during boot.
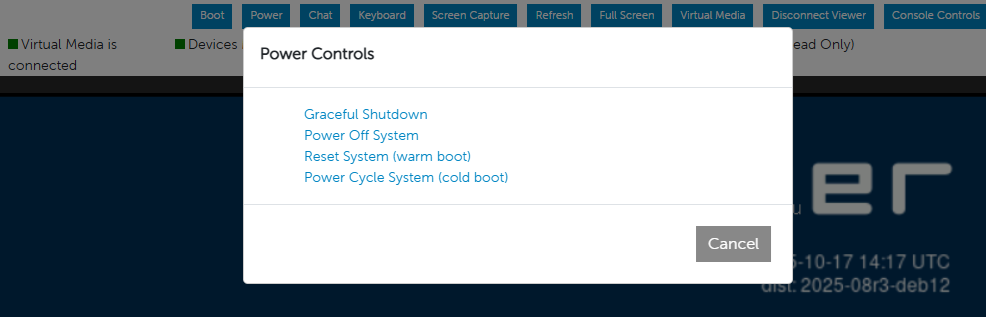 iDRAC – restart the server using Reset System (warm boot). iDRAC installation only.
3. Boot from the Virtual Optical Drive
During startup, open the Boot Manager, select One-shot UEFI Boot Menu, and then select Virtual Optical Drive.
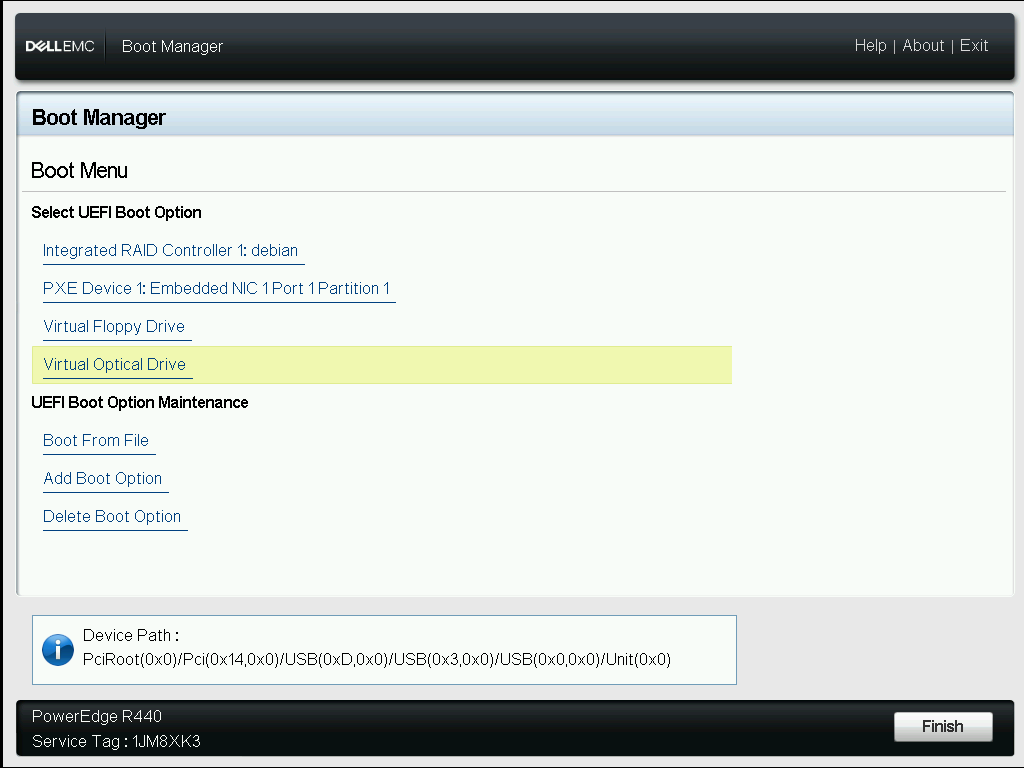 Boot from Virtual Optical Drive. iDRAC installation only.
Continue with Common Installation Steps below.
Common Installation Steps
The following steps are identical for USB and iDRAC installations.
1. Start the Installer
In the Jünger Setup menu (GRUB menu), select Graphical install and press Enter.
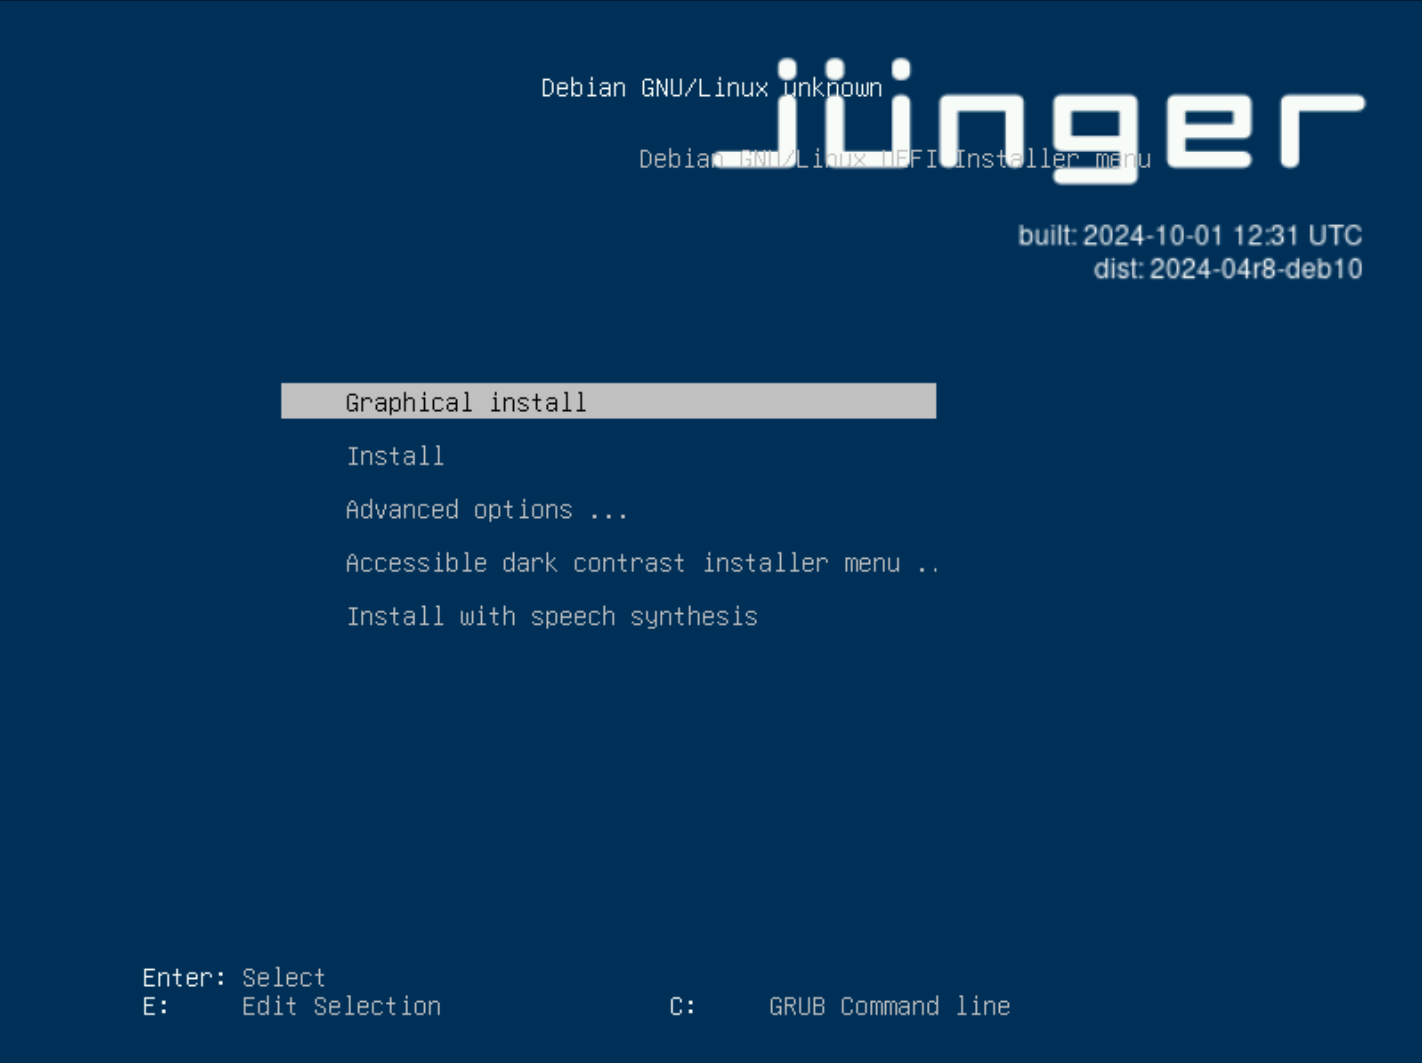 GRUB – select Graphical install. Applies to both installation methods.
2. Set the Host Name
When prompted, enter the host name to be used by the flexAIserver.
For a Jünger Audio pre-configured system, the host name can follow the device serial number, for example:
flexAIserver-00119
Alternatively, use a suitable host name according to the naming conventions of your network environment.
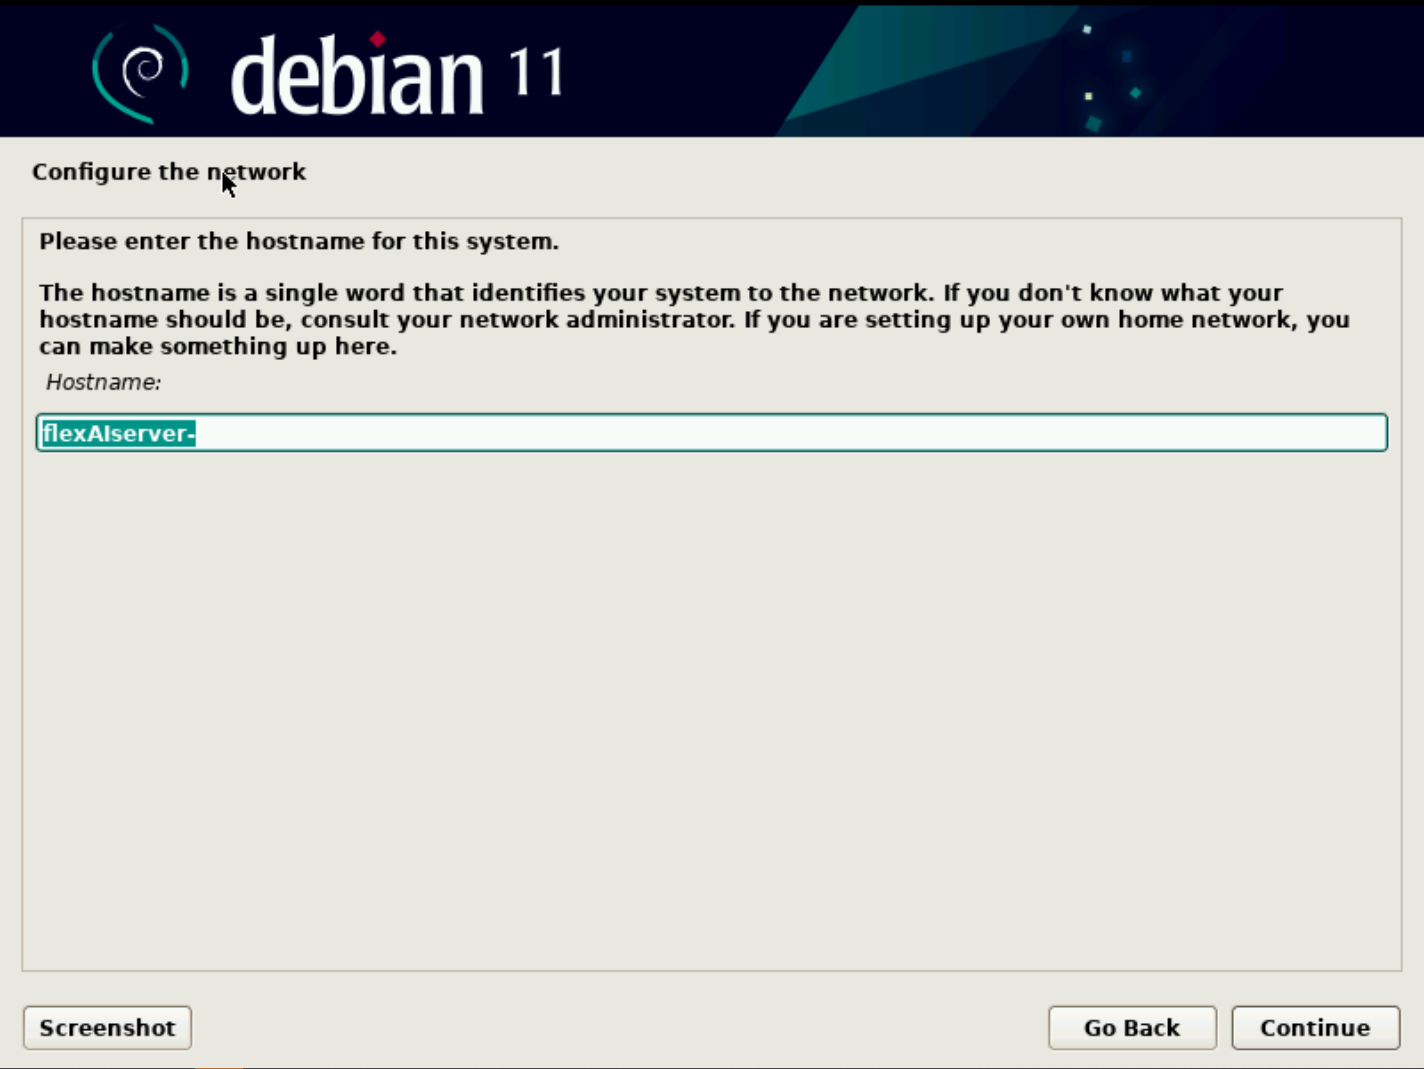 Enter the host name for the flexAIserver. Applies to both installation methods.
3. Select the Target Disk
Select the internal system disk on which flexAIserver should be installed.
On Dell PowerEdge systems with a PERC RAID controller, the internal storage may appear with a name such as DELL PERC.
If you encounter messages such as “Failed to create a file system” or “The following partitions are going to be formatted:”, select “Continue” and then “Yes” when asked “Write the changes to disk?”.
For USB installations, make sure that you do not select the USB installation drive.
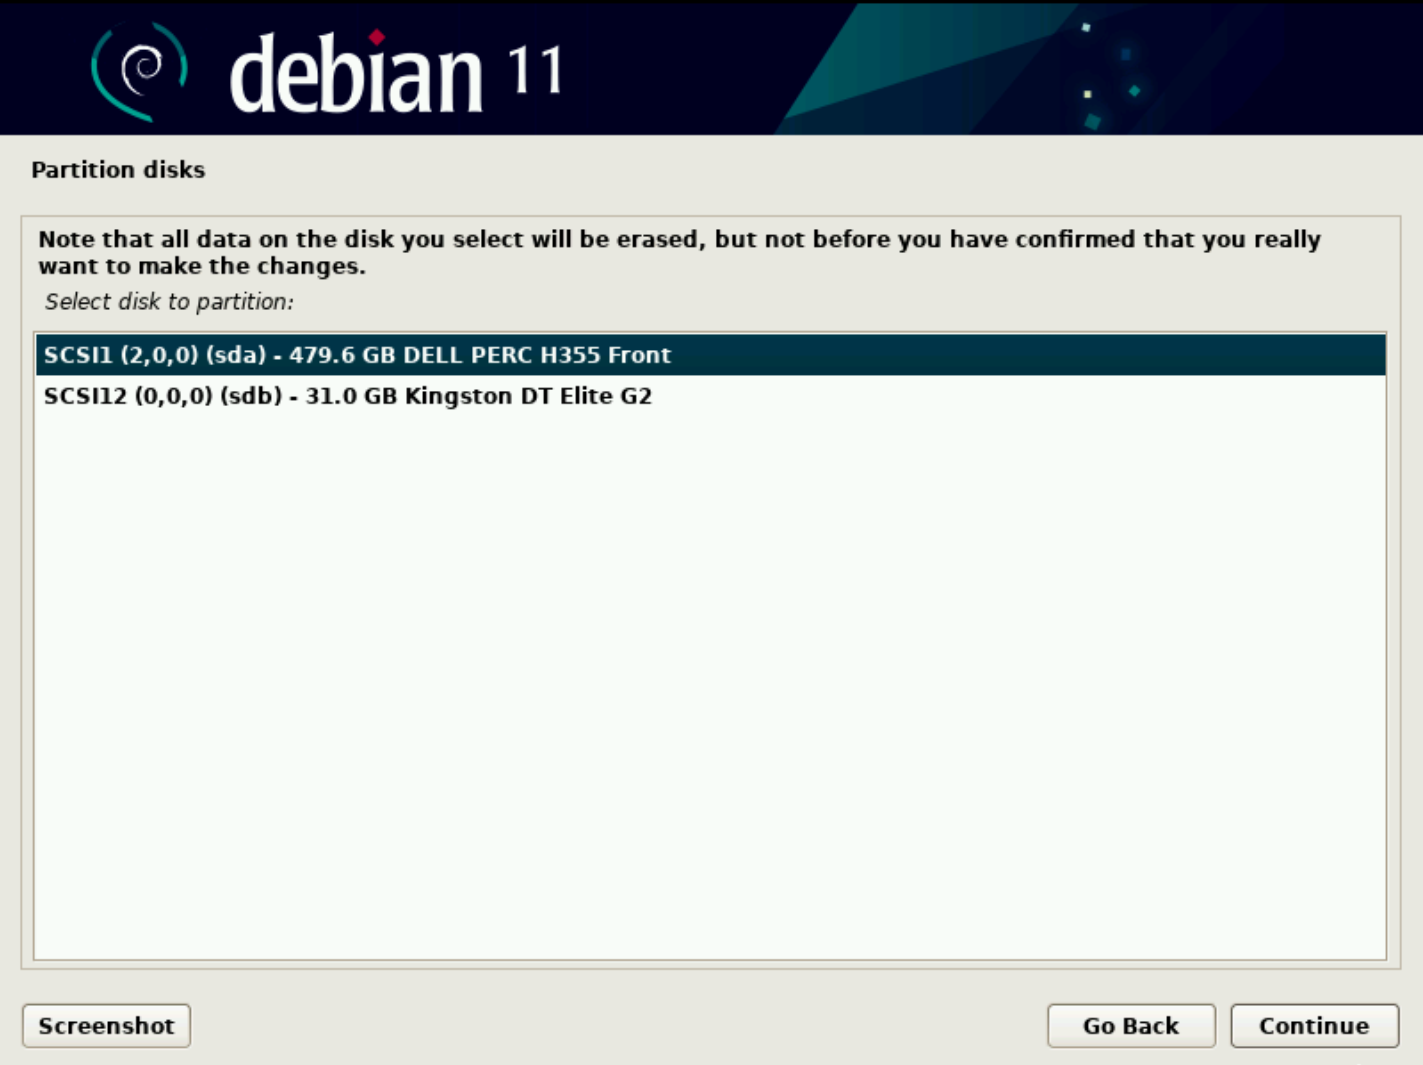 Select the internal system disk. Do not select the USB installation drive. Applies to both installation methods.
**Important -** All existing data on the selected target disk will be erased during installation. Verify the selected disk carefully before continuing.
4. Complete the Installation
Allow the installer to complete the installation process.
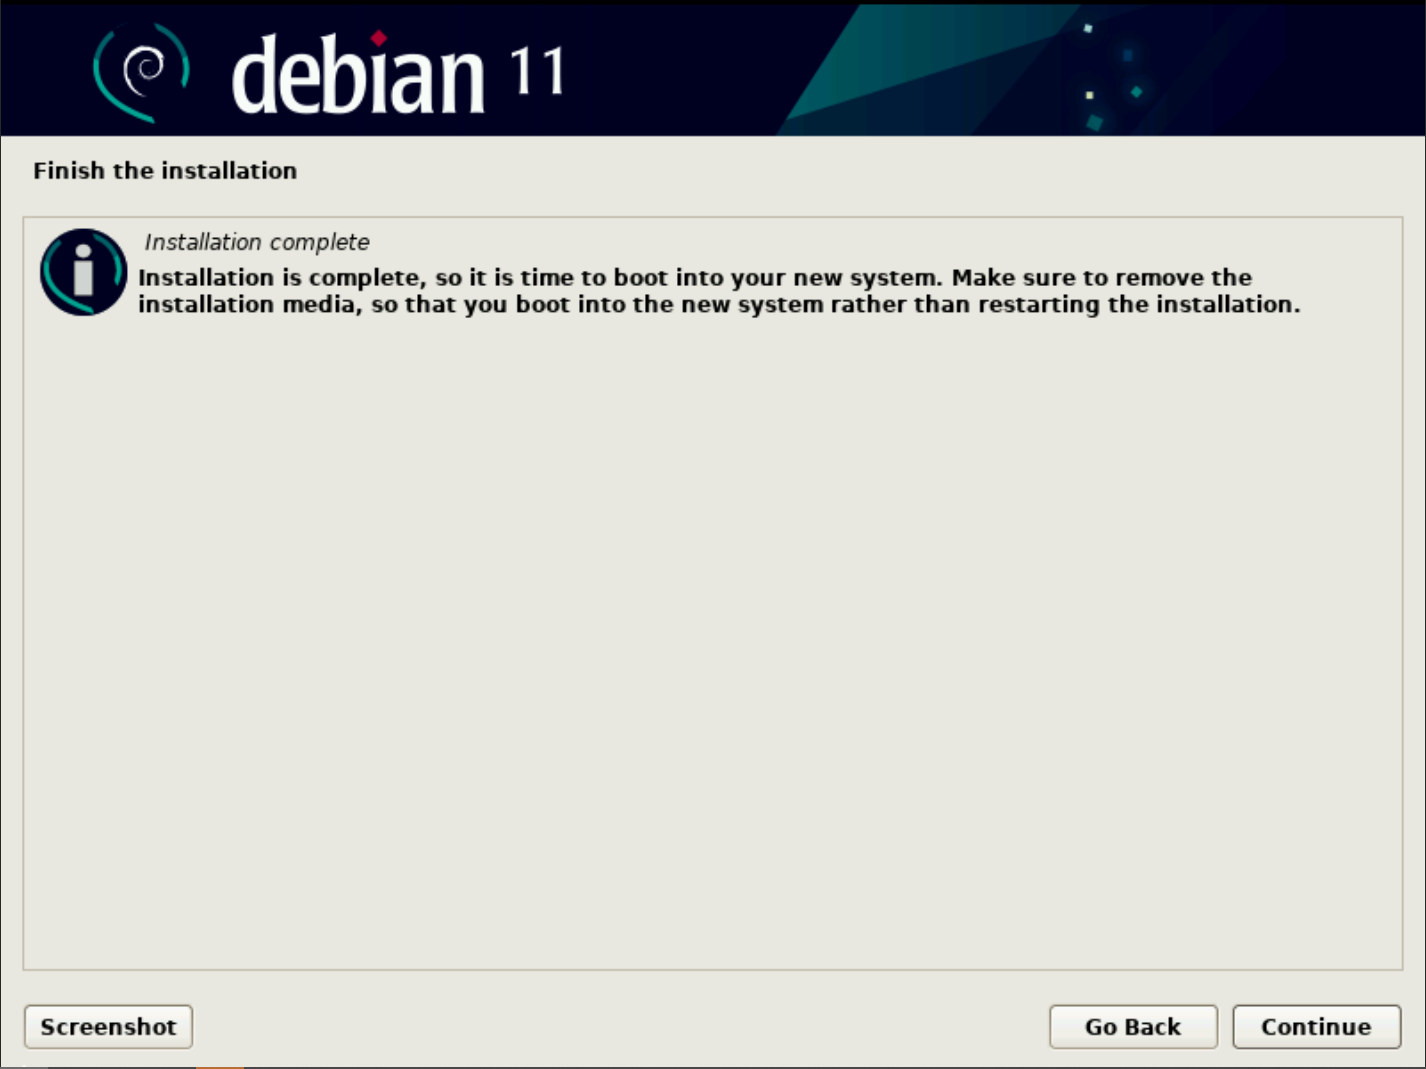 Installation complete. Applies to both installation methods.
Before rebooting:
- USB installation: Remove the USB installation drive.
- iDRAC installation: Unmap or disconnect the virtual installation media.
Restart the server and allow it to boot from the newly installed system disk.
Continue with the Initial Setup procedure to complete the flexAIserver configuration.